
Once your system is properly configured, you can start entering customer reservations. Article: Reservations Center - Get started with Ascend’s Reservations functions
Permissions Needed:
Reservations - Manage: Ability to add, edit, or remove customer Reservations.
Reservations - Override: Ability to adjust check in and check out dates and times on open Reservations.
For more information on permissions, check out our article: Users - User Permissions.
Entering reservations
- From the Ascend Desktop, click the Reservation tile.

- In the Customer section, click the magnifying glass icon and select the appropriate customer.
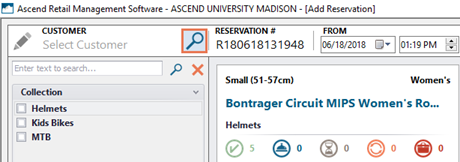
- On the toolbar, select the dates and times for when the customer wishes to have the item(s) out of the store.

- Click the View Details icon to view the customer’s information and enter Comments. Click again to return to the Reservation Scheduler screen.

- Use the left pane to search or filter to locate the desired Rental Product(s).
- In the middle pane, click to select the Rental Products you wish to add to reserve. The icons below the Description display the status of all attached Rental Items.
-
Available: Total number of Rental Items which are open to be rented.

-
Reserved: Total number of Rental Items which are on other open reservations.

-
Pending: Total number of Rental Items which are on new reservations which are not yet saved.

-
Turnaround: Rental Items remain unavailable for 15 minutes after check-in to give you time to check them over for damage, adjustments, cleaning, etc.

-
Service: Total number of Rental Items which are marked Out of Service.

-
Available: Total number of Rental Items which are open to be rented.
- In the right pane, the reservation details display.
- The rental duration displays on the toolbar.
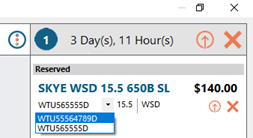
- The first available Rental Item is selected for each Rental Product reserved. If you wish to reserve a different Rental Item, select it from the dropdown below the description.

- To remove an item, click the X icon next to the item.
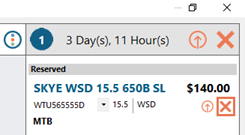
To remove all items, click the X icon next to the rental duration (on the toolbar).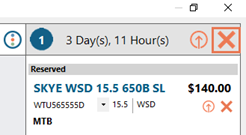
-
Estimate displays the customer’s rental charge subtotal. This amount does NOT include any taxes accrued on rental charges.
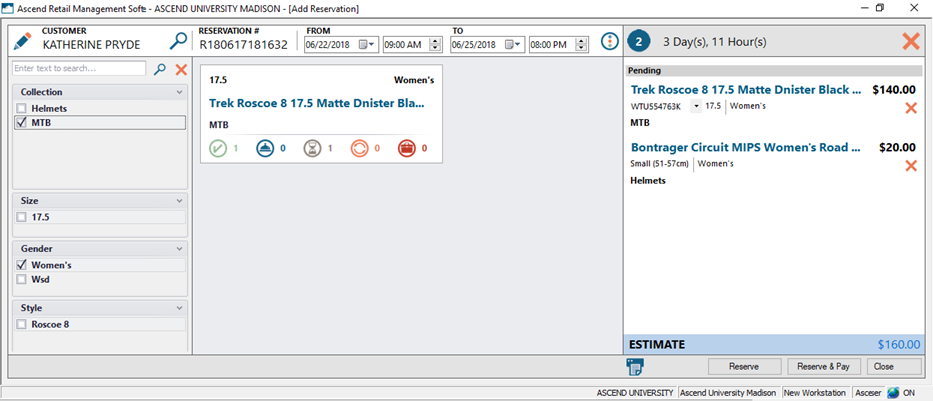
- Click the Print Details icon to print a summary receipt for the customer. Be sure to let them know the estimate does not reflect their final total due.
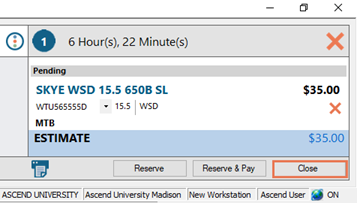
- To save the Reservation without taking a payment, click the Reserve button.
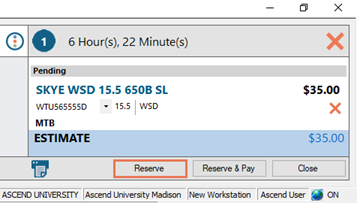
To create a transaction, click the Reserve & Pay button.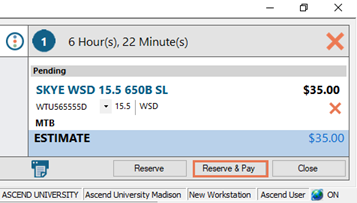
- When you are finished editing the Reservation, click the Close button.
Accessing Reservations
View all Reservations
Note: (multi-store retailers) Reservations without an associated Rental transaction can be edited at any location. Reservations created at another location display in purple text.
- From the Ascend Desktop, click the Reservations tile.

- By default, Reservations which have a timespan that encompasses the current date display. To view Reservations for a different date, enter or select the desired date.
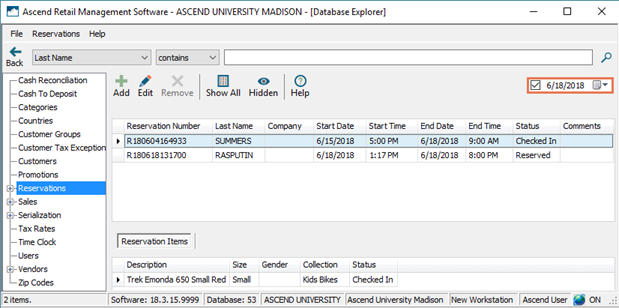
- To display all open Reservations, uncheck the box next to the date.
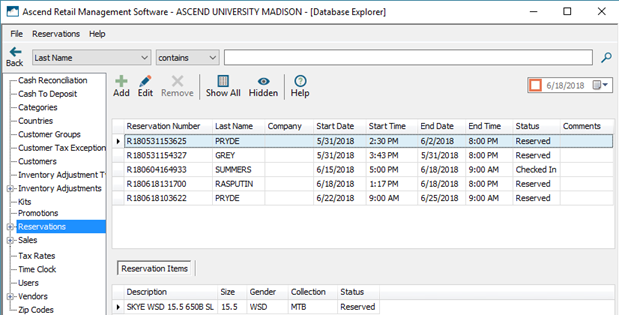
- To display all Reservations in your system (included completed Reservations), click the Show All button (on the toolbar).

View Reservations with an incomplete transaction
Navigate to Database Explorer > Sales > Rentals. All unfinished (open) transactions which are tied to a Reservation display.
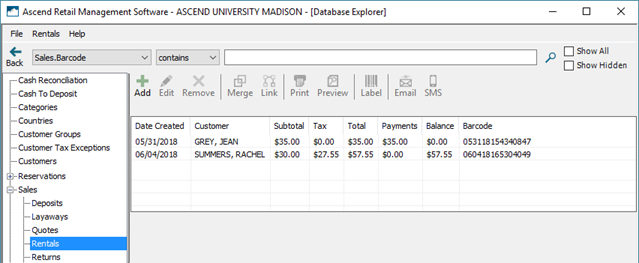
Note: Once the Reservation and transaction are both completed (finished), the transaction displays only in Database Explorer > Sales.
View Reservations for a customer
- From the Ascend Desktop, click the Customers tile.

- Search for and select the appropriate customer.
Note: Do not double-click the customer. - In the lower pane, select the History tab.
- Expand the Reservations folder. Double-click to open the Reservation.
Note: The associated transaction displays in the appropriate Transactions folder.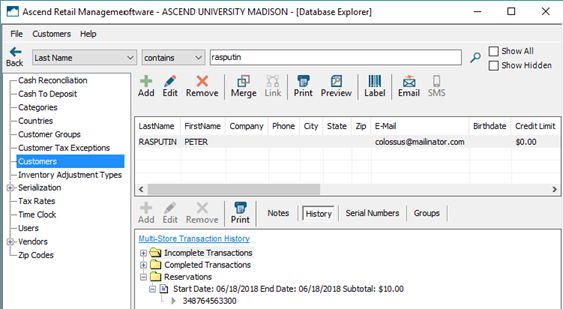
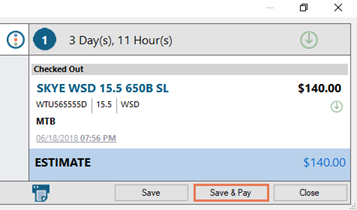
Checking out Rental Items
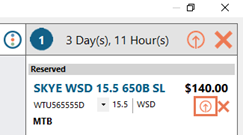
- On the Reservation screen, select the Item Number or Serial Number for the Rental Item which the customer is taking out of the store.
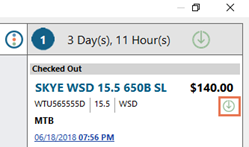
- Click the Check-Out icon next to the item.
To check out all items on the Reservation, click the Check-Out All icon next to the rental duration (on the toolbar).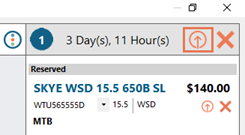
The checkout information displays under the item information.
Note: Users with the Reservations – Override user permission can change the check-in or checkout date/time by clicking the date.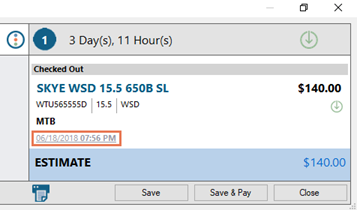
- Click the Print Details icon to print a summary receipt for the customer. Be sure to let them know the estimate does not reflect their final total due.

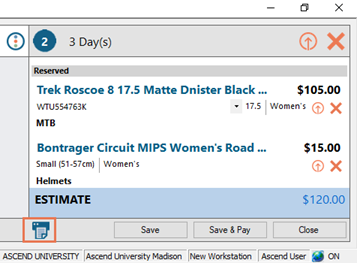
- To save the Reservation without taking a payment, click the Save button.
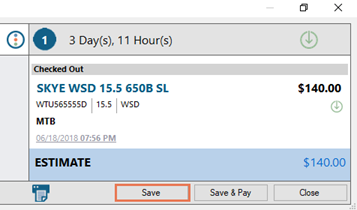
To create a transaction, click the Save & Pay button.
- When you are finished editing the Reservation, click the Close button.

Checking in Rental Items
- On the Reservation screen, click the Check-In icon next to the item
To check out all items on the Reservation, click the Check-In All icon next to the rental duration (on the toolbar).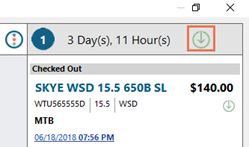
The duration information displays under the item information.
Note: Users with the Reservations – Override user permission can change the check-in or checkout date/time by clicking the date.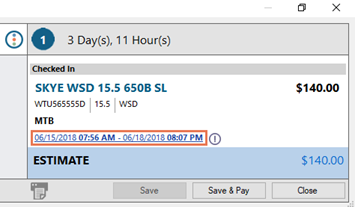
- Click the Save & Pay button and complete the transaction.
Creating a sale
- From the Reservation, click the Reserve & Pay/Save & Pay button.
- A transaction containing a Rental Charges sale item is created. This item’s Price is calculated based on the Reservation length and the Rate Program associated with the Collection to which the Rental Item(s) belongs.
Note: Checking in/out an item before/after its scheduled date does not affect the Rental Charges amount.
- Rental Charges can be discounted as desired. However, all discounts are reset when changes are made to the duration in the Reservation.
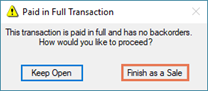
- Payments (partial or full) may be processed at any time. The Keep Open button (on the toolbar) is automatically selected, and remains so until the entire Reservation is checked in.
- When the Reservation is complete and the transaction is fully paid, click the Finish as a Sale button on the Paid in Full Transaction prompt.
Additional Resources
KB22-213