
If you have a large number of Rental Products to add to your system, you can easily import them into Ascend instead of creating each one manually.
- Download the Rental Product Import Template from the Retailer Portal linked from www.ascendrms.com directly via this link.
- Enter the following information as needed.
-
ID: If you are importing new Rental Products, leave this field blank. If you exported your Rental Product list to edit your existing list, DO NOT edit this column.
Note: When sorting in Excel, be sure to sort ALL columns. - Description: Leave this field blank to automatically generate a value based on the other fields in the file.
- Style: Enter the style or model name (e.g. Farley, Circuit WaveCel Road Bike Helmet).
- Size: Enter the product’s size (e.g. XL)
- Gender: If applicable, enter the gender for whom the product was designed.
- Color: Enter the color name.
- Year: Enter the model year.
- Brand: Enter the manufacturer’s brand name.
- Manufacturer Part Number: Enter the manufacturer’s part number for the product.
- UPC: Enter the UPC or EAN for the product.
- Rental SKU: Leave this field blank to automatically generate a value based on the other fields in the file.
-
Collection: Enter the name of the Collection to which the product belongs. If you wish to assign this product to an existing Collection, enter the name exactly as it appears in Ascend. If no match is found for the value entered, a new Collection is created.
Note: Any new Collections created using the Rental Product import process are assigned the $0 SYSTEM DEFAULT RATE.
m. Non-Itemized: Enter TRUE if you do not wish to track individual Rental Items. If this field is left blank, the default value of FALSE is used.
-
ID: If you are importing new Rental Products, leave this field blank. If you exported your Rental Product list to edit your existing list, DO NOT edit this column.
- Save and close the file.
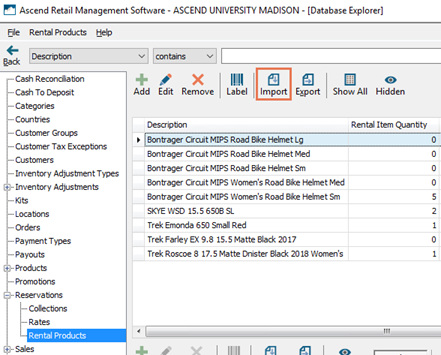
- Navigate to Database Explorer > Reservations > Rental Products in Ascend.
- On the toolbar, click the Import button.
- Navigate to the location where the spreadsheet is saved and double-click it.
- In the Select Columns dialog box, check the fields you wish to import and click the OK button. To select all fields, click the Select All button. To clear all selections, click the Select None button.
Note: ID and Description are required and cannot be unchecked.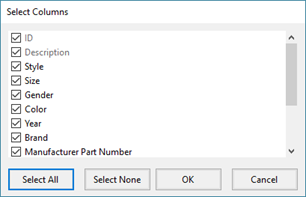
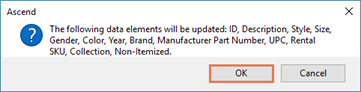
- On the Data elements will be updated prompt, click the OK button to confirm.
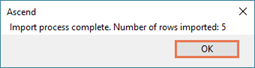
- On the Import process complete prompt, click the OK button.
Additional Resources
KB22-212