
In Ascend Fall 2017, your store’s Spaces list automatically populated with all values from the Located field on incomplete repairs and the In-Store Location field on serial numbers, so you may need to clean up this list a bit. If you’re new to Ascend, you’ll need to set up this list as part of your initial install. And, of course, your available service area can always change.
Multi-store retailers: Spaces are specific to your store and do not share between locations. Each location must manage their own Spaces.
Getting started
You can access your store’s Spaces list from two locations.
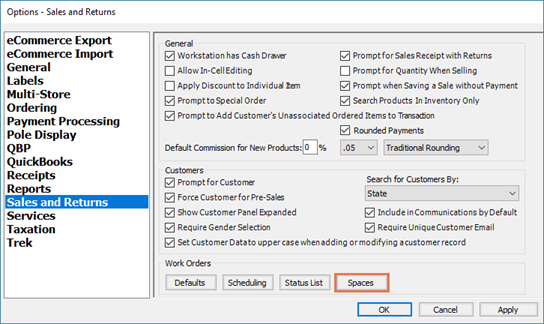
- From the Ascend Desktop, click the Options tile and select Sales and Returns. In the Work Orders section, click the Spaces button.
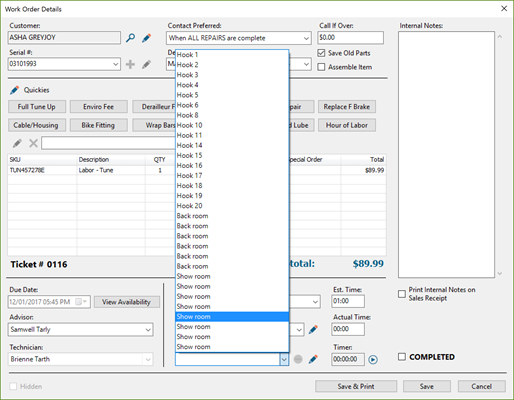
- From Work Order Details, click the pencil icon next to the Spaces drop-down.

Note: In order to access your store’s Spaces list, users need the System Tools user permission.
When you’re done with your changes, just click OK.
Add a Space
In the Spaces list, click in the blank cell at the bottom of the list and type your desired Space name.
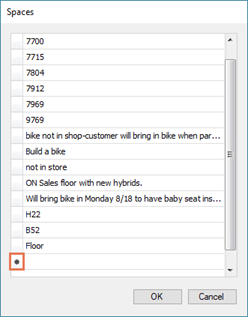
Note: The asterisk symbol (*) next to the row indicates you’re creating a new Space.
Multiple Spaces can share the same name, but only one repair or serial number can use the same Space. So, if you have one large service holding area that can store 12 repair or service items, you’ll need to add 12 Spaces with the name SERVICE HOLDING.
Spaces settings
In Options > Sales and Returns > Spaces, there's a box for Only Show Available Spaces for Selection. It is checked by default.
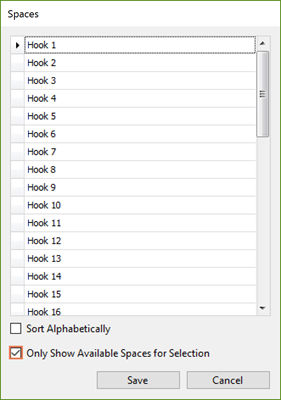
It means that, in the Work Order Detail, you will only see free spaces in the Spaces dropdown.
You can uncheck this box to see both the free and filled spaces.
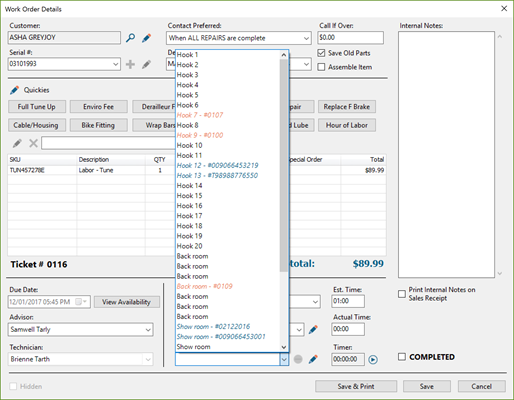
Note: If a Space displays in orange text, it's assigned to a repair item (Work Order Detail). If it displays in blue text, it's assigned to a Serial Number record.
Modify a Space
In the Spaces list, double-click the Space you wish to edit and make your changes.
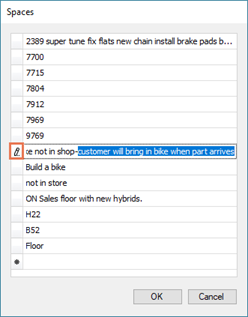
Note: The pencil icon next to the row indicates you’re editing a Space.
To change the order of your Spaces list, click and drag a Space into its desired location.
Remove a Space
In the Spaces list, right-click the Space you wish to remove and select Delete Row.
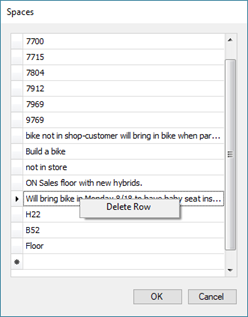
If the Space is currently in use, you’ll be prompted whether to remove it.

Additional Resources
KB22-158