
Promotions allow you to automatically discount entire categories or product lists so that your cashiers don’t need to remember to do so. Customer Groups allow you to offer promotional pricing to certain segments of your customer base. And Coupons allow you to take a specific dollar value off of a customer’s transaction total.
But sometimes, your cashiers or managers might need to discount a product, or even an entire transaction, for some other reason. Maybe your store has a price match policy, or a customer agreed to buy a pair of shorts with a run in them for a discount, or perhaps you just need to give a customer a price break in order to soothe an irritation. Whatever the reason, Ascend’s discount calculator makes it easy to apply, whatever sort of discount you require.
Overriding discount
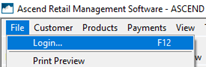
Users can only apply discounts up to the Maximum Discount percentage configured on the Permissions tab of their User record. If you need to switch users, mid-transaction – e.g. to allow a manager to apply a higher discount than the cashier is allowed – select the File menu > Login or hit F12 key (on the keyboard) > enter password > apply the discount to the transaction > select File menu > Login or F12 key (on the keyboard) and have the employee log back into the transaction.
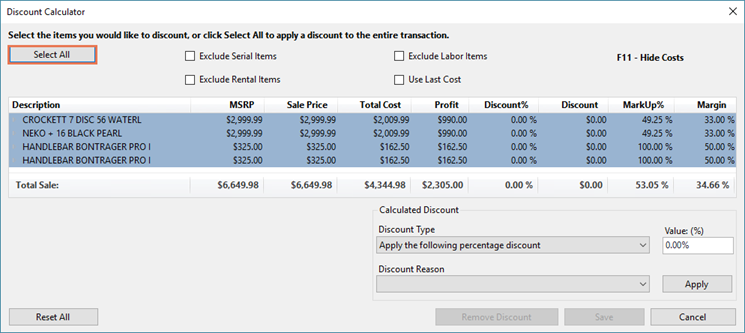
Discount Calculator
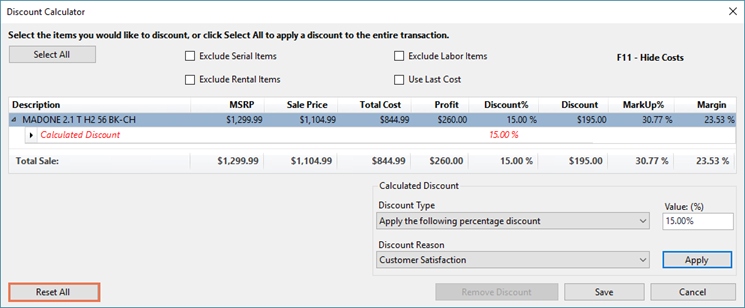
Using the Discount Calculator is an Ascend best practice as it allows you to track the reason item(s) are being discounted. You can use the discount calculator to discount single or multiple items.
- From the transaction toolbar, click the Discount button or F9 key (on the keyboard).

- If you do not wish to display your cost for items (e.g. you wish to show the computer screen to your customer), press the F11 key (on the keyboard). Press again to redisplay costs.
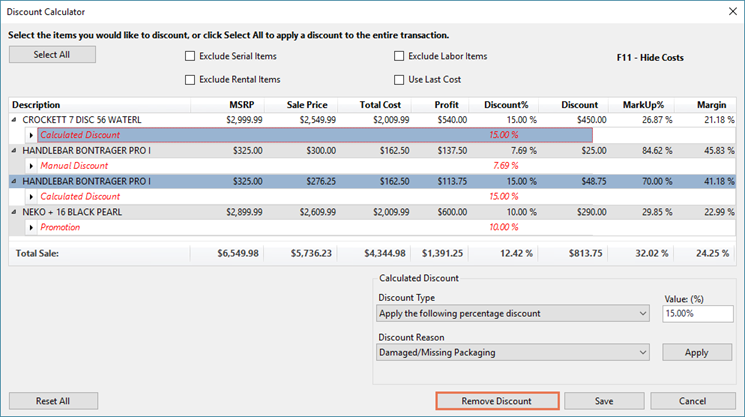
- Select the items which should receive the same discount amount.
- To select multiple adjacent items: Select the first item, then press and hold the Shift key (on the keyboard) while selecting the last item.
- To select multiple non-adjacent items: Press and hold the Ctrl key (on the keyboard) while selecting the desired items.
- To select all items: Click the Select All button.
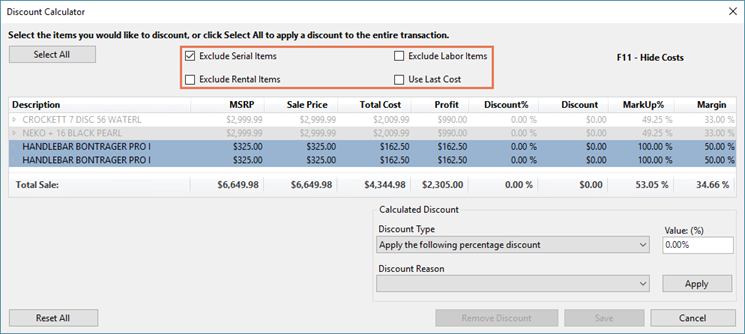
- Certain categories can be excluded from multiple-item discounts.
- Check Exclude Serial Items to exclude any products in a category which is marked Serialized (e.g. Bikes).
- Check Exclude Labor Items to exclude any products in the Labor category (or its child categories).
- Check Exclude Rental Items to exclude any products in a category which is marked Rental (e.g. Reservations).
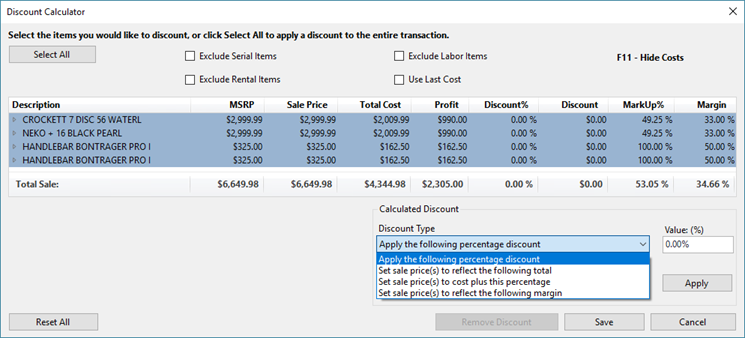
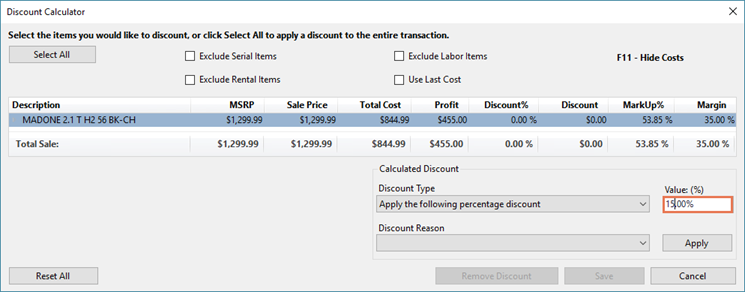
- From the Discount Type dropdown, select the type of discount you wish to apply.
- Apply the following percentage discount: Take a specific percentage off of the items’ MSRP.
- Set sale price(s) to reflect the following total: Adjust the amounts of all selected items to equal the total amount entered.
- Set sale price(s) to cost plus this percentage: Add a specific percentage amount to the cost of the item(s).
-
Set sale price(s) to reflect the following margin: Adjust the amount(s) of the item(s) to maintain a specific margin percentage.
- If you chose a Discount Type which is dependent on your cost value (Set sale price(s) to cost plus this percentage or Set sale price(s) to reflect the following margin) > check Use Last Cost to calculate the discount based on the most recent cost at which the product was received.
Note: By default, Average Cost is used for calculations. If the product has never been received (e.g. a special order item), Estimated Cost is used.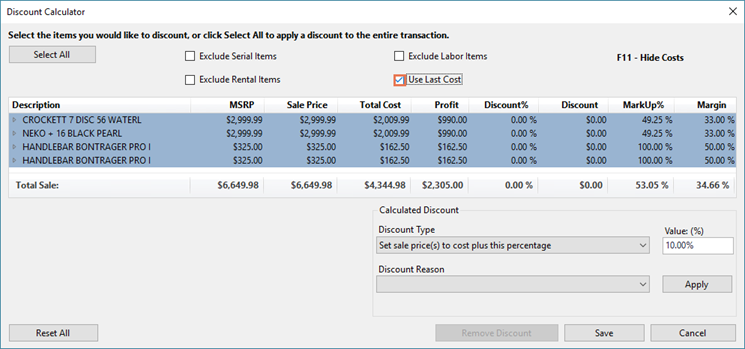
- In the Value field, enter the appropriate dollar or percentage amount.
- From the Discount Reason dropdown, select the reason for the discount. Ascend best practice is requiring a discount reason. There are Discount Reasons built into Ascend. You can add or modify those Discount Reasons at anytime through Options > Sales and Returns > Discounts > Reasons
Note: Discount Reasons are required by default – but if you aren’t concerned with why your employees are applying discounts, you can uncheck Options > Sales and Returns > Discounts > Reasons > Require Discount Reason.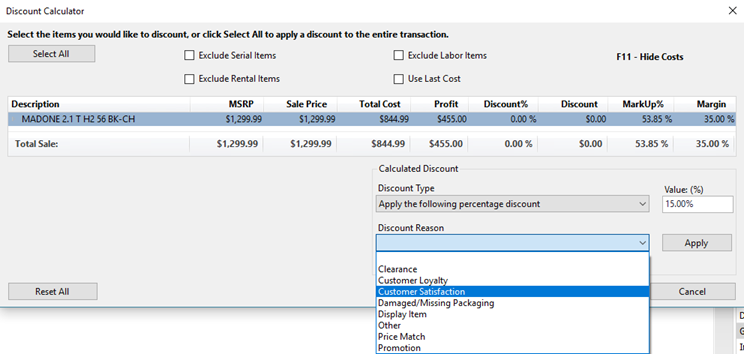
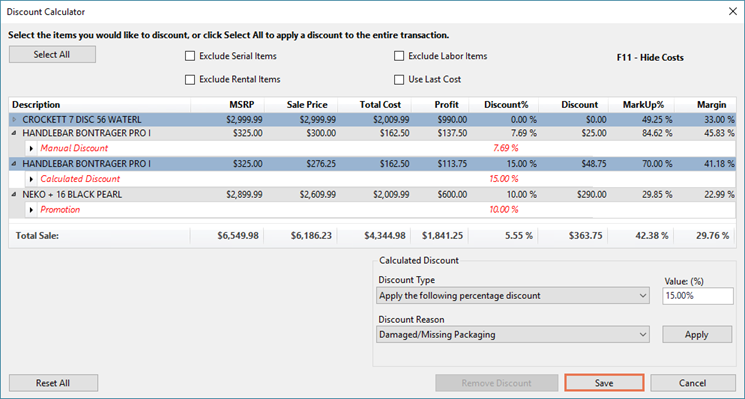
- Click the Apply button.
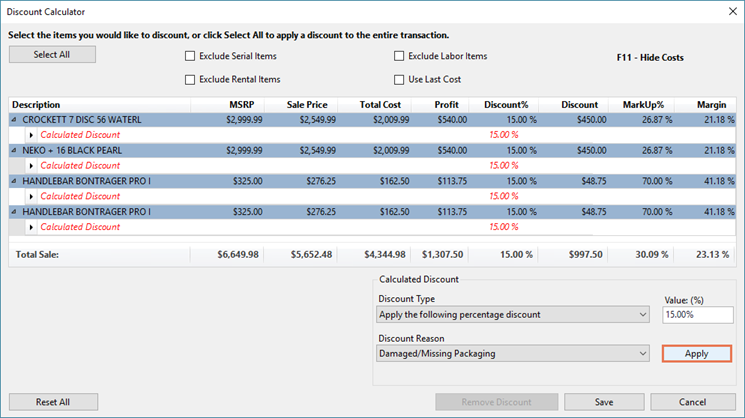
- To remove all applied discounts, click the Reset All button.
- To remove a single discount, select its Reason and click the Remove Discount button.
- When all discounts are applied as desired, click the Save button.
Manually Discount a single sale item
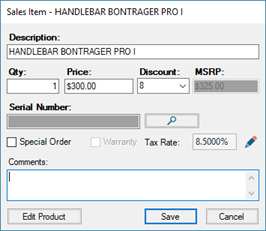
- From the transaction screen > Double-click the item to discount or Right-click the item > Edit.
- From the Discount dropdown, select the appropriate discount amount.
OR In the Price field, enter the discounted amount. - Click the Save button.
KB22-138