
Before you begin
- This article reviews Ascend Pay and QuickBooks integration. Haven't heard of Ascend Pay? Click here to join the fun!
- This is only required if you integrate Ascend with QuickBooks.
QuickBooks
- In QuickBooks, create a new clearing account (other current asset, OCASSET) to be used for the Ascend Pay In Transit funds.
- The OCAsset account is a new account that needs to be created by all Ascend Pay customers.
- Note: If you are a multi-store retailer, it is recommended to create a OCASSET account for each location.
- The OCAsset account is a new account that needs to be created by all Ascend Pay customers.
- Import the new Chart of Accounts from QuickBooks into Ascend by following these instructions.
Ascend Options
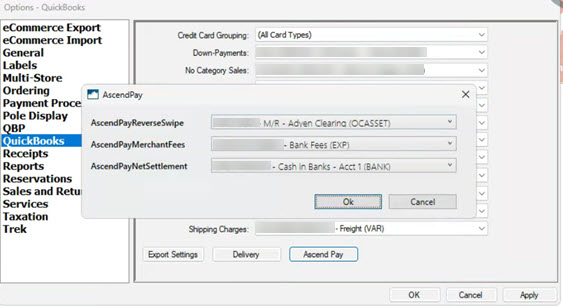
- Navigate to Options > QuickBooks.
- Change Credit Card Grouping to (All Card Types).
- Click the Ascend Pay button.
- Map the following accounts:
- AscendPayReverseSwipe: Enter in the newly created clearing account mentioned in the QuickBooks section above. This will temporarily hold funds not yet deposited into your bank account.
- AscendPayMerchantFees: Enter in the expense account for credit card fees.
- AscendPayNetSettlement: Enter in the bank account Ascend Pay will be using to deposit the funds captured.
- Click OK to save changes.
Ascend Database Explorer
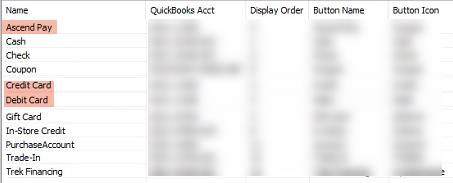
- Navigate to Database Explorer > Payment Types.
-
For the following Payment Types, change the QuickBooks Acct mappings to the newly created clearing account from the QuickBooks Setup section above.
- Ascend Pay
- Credit Card
- Debit Card
KB24-008