
Before you begin
- Ascend Pay is required to use the Verifone P400 Plus terminal. Haven't signed up yet? Well what are you waiting for?!?!
- Still need to finish signing on the dotted line? Follow these instructions to complete onboarding.
- Verifone's must be purchased directly from Ascend. Click here if you still need the hardware.
Supported Devices
Ascend supports the Verifone P400 Plus and Castles S1F2 devices. If you have additional questions about support devices and hardware requirements, check out our article, Hardware - Requirements.
Connect the Verifone P400 Plus to your network
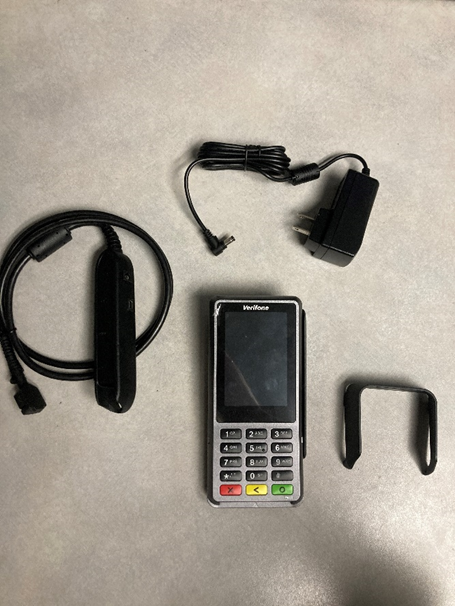
- Gather your equipment. Each terminal comes with 4 parts: The terminal, power cord, dongle cable and privacy shield. (Image 1)
- Plug in your terminal to a power source near the workstation you'll be assigning it to.
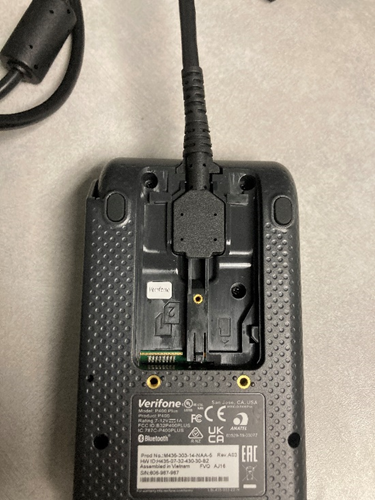
- Turn over your terminal and slide off the cover. (Image 2)
- Connect the end of the dongle cable to the terminal and put the cover back on and secure
- Plug the power cord into the correct port on the dongle and plug into the power source.
- Connect to the internet.
- Connecting using an Ethernet cable will automatically connect to the network.
-
To connect to Wi-Fi:
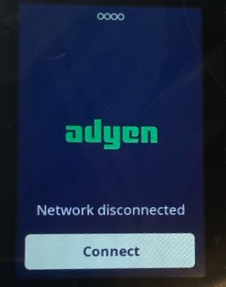
- Click Connect. (Image 3)
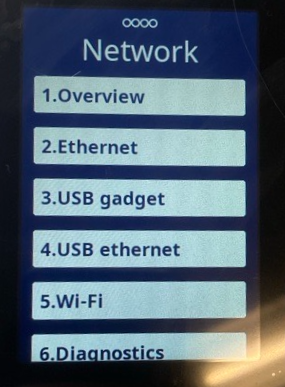
- Select 5. Wi-Fi. (Image 4)
- Enter in your Wi-Fi name and password using the onscreen keyboard.
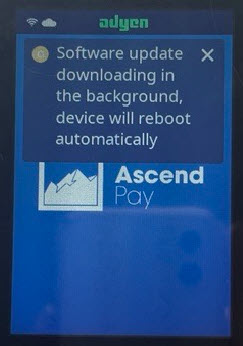
- Give the device time to download configuration, update software, and reboot. (Image 5)
- The device may need multiple reboots.
- This can take an hour or more, do not interrupt updates or reboots.
- We recommend plugging everything in and leaving the device to configure overnight.
- After all the updates and reboots, the device will show the Ascend Pay logo.
- Now we need Ascend to recognize it!
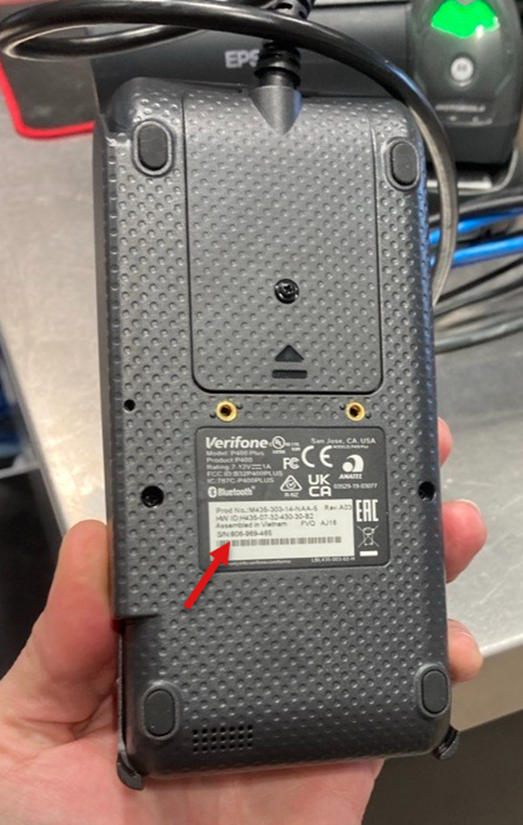
Locate Verifone P400 Plus Serial Number
On the bottom of the Verifone P400 Plus device you will find the serial number. You will need this serial number to assign the device to the workstation in Ascend > Options.
Set up Ascend Payment Processing Options
- From the Ascend client on your workstation, navigate to Options > Payment Processing.
- Select Ascend Pay from the drop down menu.
- Under Set Payment Device, choose the payment terminal (listed by serial number) to associate with this workstation.
- The serial number is located on the bottom of the Verifone terminal (see image below).
-
Note: Only payment terminals assigned to this location by the Ascend Team will display here.
- Terminals must be purchased through Ascend to work with Ascend Pay.
- Still need a terminal? Well how in the world did you get all the way here? Let's get you a device!
- Click Apply to save your options.
- You did it! Start using that terminal and make lots of money!
QuickBooks account mapping
Note: This is only required if you integrate Ascend with QuickBooks.
Follow the instructions found here.
Would you like to add a Logo to your device?
Currently logos need to be set through our Adyen Admin portal. Please contact Ascend Support for assistance.
- Logo size requirements: 320 x 450
- File type: bmp/jpg/jpeg/png
KB24-005