
Parfois, il faut retourner un produit; et ce n'est pas grave. Mais, quand ça arrive, nous voulons qu'il soit facile pour vous et le client de retourner le(s) produit(s).
Retour d'un produit
- Cliquez sur l'icône Return du bureau Ascend.

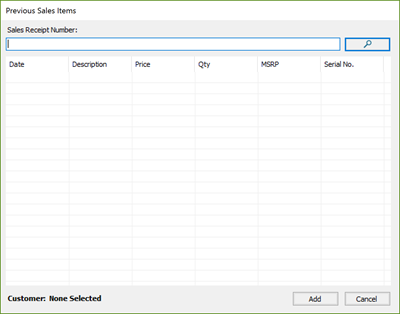
- En fonction de vos paramètres, vous pourriez être invité à scanner le code-barres de l'étiquette de la vente initiale sur la fenêtre Previous Sales Items .
- Si vous avez le reçu, vous pouvez le scanner. Si vous n'avez pas le reçu, appuyez sur Escape sur votre clavier, joignez un client à la transaction, et passez à l'étape 7.
- Une fois que vous scannez le code-barres, les éléments de vente apparaîtront dans la fenêtre. Cochez les produits que le client veut retourner.
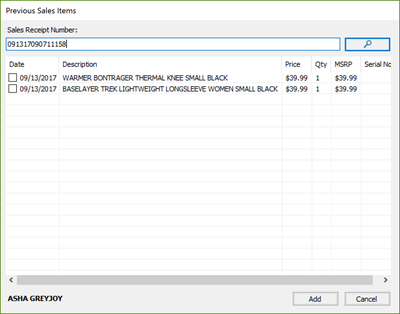
- Cliquez Add.
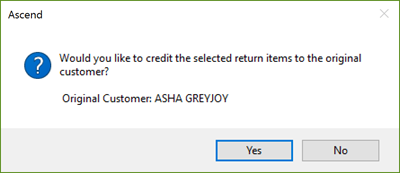
- L'option de donner un remboursement au client apparaît. Cliquez Yes. Si vous cliquez No, vous devez joindre un client différent à la transaction.
- Une fois qu'un client est sélectionné, l'écran de vente s'ouvre.
Si vous avez utilisé la fenêtre Previous Sales Items, le prix initial est automatiquement appliqué au produit, et le produit a une quantité négative.
Si vous n'avez pas scanné le reçu initial, vous devrez ajouter le produit étant retourné. Scannez le produit pour l'ajouter. Ascend donne automatiquement une quantité négative au produit.
C'est possible que le prix qui apparaît, n'est pas tout à fait exact pour votre client. Ascend utilise le prix le plus bas pour lequel ce produit a été vendu (y compris les promotions) afin d'éviter la fraude. Vous pouvez modifier ce prix, au besoin.
- Une fois que le produit est joint au retour, vous remarquerez que la Balance s'affiche entre parenthèses, ce qui indique un solde négatif, tel que (49,99). Cela signifie que l'argent « quitte » votre magasin et sera donné au client.
- Maintenant, sélectionnez le type de paiement que vous souhaitez utiliser pour retourner le total (par exemple Espèces, Carte de crédit etc.) et fermez la transaction.
Le produit retourné est maintenant dans votre base de données et peut être revendu.
Trouver le numéro du code à barres de la transaction initiale
Si vous suivez les meilleures pratiques dans Ascend, et vous joignez un dossier client à chaque vente, vous pouvez trouver la transaction initiale, même si le client n'a pas son reçu!
- Cliquez l'icône Customers ou View > Customers sur le bureau Ascend.
- Utilisez la barre de recherche pour trouver votre client.
- Sélectionnez le nom du client dans les résultats pour voir leurs informations de compte.
- Sélectionnez l'onglet History.
- Développez le dossier Completed Transactions pour trouver la vente initiale.
- Double-cliquez sur la transaction initiale pour l'ouvrir.
- Dans l'écran de la transaction, cliquez Tools > Copy sales barcode number.
Maintenant, vous pouvez retouner au bureau Ascend, créez un nouveau retour, et passez le code à barres dans la fenêtre Previous Sales Item (étape 2).