
The label audit can be the most labor-intensive part of your Ascend installation. The goal of the Label Audit is to make sure every product in your store is accurately entered in Ascend, ensuring that:
- All products in your store have a label that can be scanned and recognized in Ascend.
- The MSRP on the product labels match the MSRP in Ascend.
- The correct product description comes up when you scan the label.
A label audit prepares you for both a full-store inventory before your go-live with Ascend and future success with the Ascend program.
Prior to your label audit, you will have an 1-2 hour training session with your installer. Here’s how you can prepare for it:
Hardware Setup
Prepare your Server PC (Dell Pro Max Micro)
Before setting up any additional PCs, we first need to have your Ascend Server setup so we can create and activate your Ascend database and a few other important programs.
Once it arrives the first thing, we will need you to do is to set it up, turn it on, setup Microsoft Windows and connect to your network with internet access as soon as you can. Your installer will provide instructions for installing Microsoft Windows.
After Microsoft Windows is install and the server is connected to the internet, contact your installer to have them get remotely connected and being the Ascend database install. We will remotely connect through: https://support.ascendrms.com/
Prepare your (Zebra ZD411) Label Printer
- Remove the printer and cords (one black, two-piece power cord and one white USB cord) from the box and place next to the computer.
- Load a roll of labels face-up into the printer.
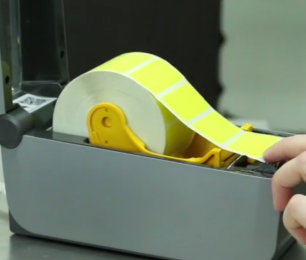
- Plug in the printer power cable and USB cable into your server PC. Your installer will walk you through the Hardware - Install the label printer process during your training session.

Prepare your EA660 Inventory Scanner
- Remove the scanner, USB cord, and grid sled (if you ordered one) from their packaging and place next to the computer.
- Plug the USB cable into the back of the computer or USB wall adapter.
- Note: Other USB ports (e.g. on the computer monitor, the front of the computer, a USB hub) may not receive sufficient power to charge the device quickly.
- Plug the other end of the USB cable into the device and let it charge for 24 hours while powered off.
Your installer will walk you through the install process for your inventory scanner during your training session.

Prepare your Barcode Scanner
We want to setup your cordless barcode scanner on the server for the Label Audit.
- Remove the scanner, battery, cable, and scanner cradle/base from their packaging and place next to the computer.
- Place the battery into the scanner.
- Plug the cable into the scanner cradle/base and the USB end into the computer.
- Place the scanner into the cradle and let it charge.
Your installer will walk through calibrating the scanner with you during your training session.
.
Additional Resources
KB22-206