
Unsupported Hardware
The MC2180 is no longer supported. Please upgrade to the recommended device, which can be found here
While the Inventory Center is compatible with the MC2180 inventory scanners, we recommend upgrading to the Unitech EA520 inventory scanner (see Configure the Unitech EA520 Inventory Scanner: Set Up AscendScan and BeyondTrust). This scanner is paired with Ascend Scan software for easier scanning. Contact sales@ascendrms.com for more information on purchasing scanners.
Moving the scan files to the computer
Once you've finished scanning your products, it's time to move that data to your computer. Article: Walking through the inventory scanning process for Cycle Counts and Full-Store Inventory
Pick up the scanner and touch the screen or press the blue button and then 0 (zero) to finalize the file.
Make sure the scanner is on the main scan screen before docking it. Otherwise, the section file name and count will not show in the file folder.

- Dock the scanner.
- The Windows Mobile Device Center should launch. If it doesn't search for Windows Mobile Device Center on your computer, and open the program.
- The Device Center should show that the scanner is connected.
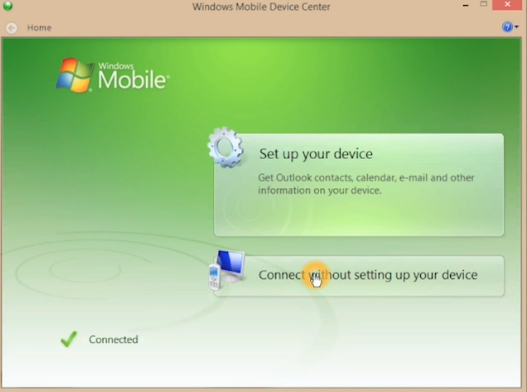
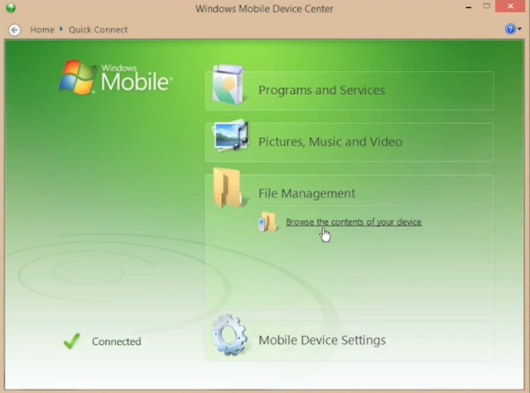
- Select Connect without setting up your device > File Management > Browse the contents of your device.
-
File Explorer opens. Select Storage Card.
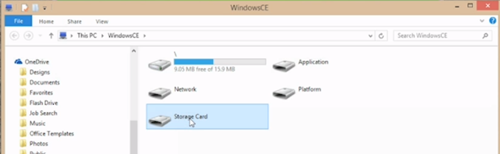
The file you're looking for should be labeled section[#]_count[#] (for example: section036_count104).![Screenshot of File Explorer with section[#]_count[#] selected](https://static.helpjuice.com/helpjuice_production/uploads/upload/image/13568/2498483/Inventory_Importing_FileExplorer2.png)
- Right-click the file and select Copy.
- Open your Inventory Files folder.
- Hit Control + V on the keyboard to paste the file into that folder.
- Write the section count number in the Scan count column on the Section status checklist.
Importing the files into Ascend
After scanning, initial the scanner line of the section number print-out, and head back to the inventory point person’s workstation. Dock the MC2180 scanner again. Highlight the appropriate section in the Inventory Center and click the Edit icon by Scan Count.
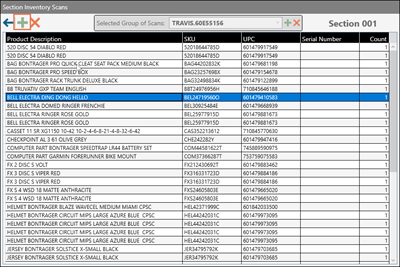
The Section Inventory Scans screen opens. Go to Add Selected Group of Scans and click the Add icon to open File Explorer.
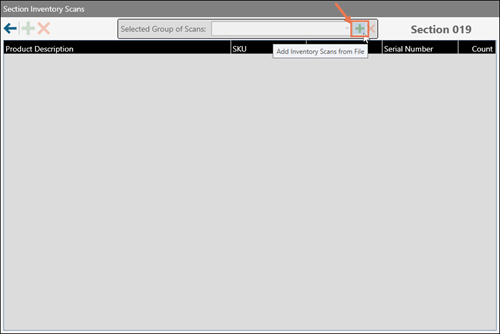
With the MC2180 scanner docked at this workstation, you can easily navigate to the section file on the scanner and import it into Ascend.
On the Section Inventory Scans screen, you can also select the Add Inventory Scan icon on the left to manually add a product to the scan, and update that product count, if needed.
Click Back when you’re done.
After a scan file is manually imported, the section will turn brown, like normal, indicating that it’s ready for a physical piece count. That section will disappear from your Scan Items list and appear in the Piece Count list on the Unitech EA500 Plus scanners.

Then delete the section file from the MC2180 scanner, and your staff can move onto another section with that scanner - or move onto piece counts if scanning is complete.
KB22-110