
Android Setup
-
Enable Android 3-button navigation (if the three standard Android buttons are not already visible at the bottom of the display):
- Settings > System > Gestures > System Navigation > Select 3-button navigation
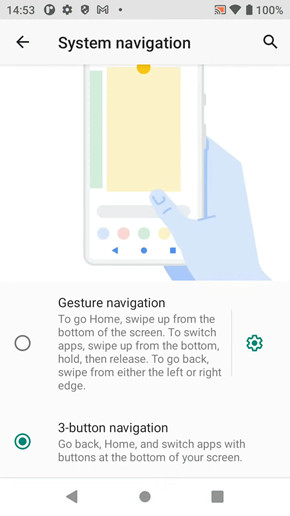
- Settings > System > Gestures > System Navigation > Select 3-button navigation
- Set the Screen timeout to 5 minutes:
- Settings > Display > Advanced > Screen timeout
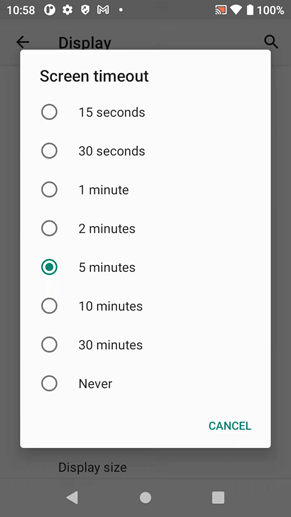
- Settings > Display > Advanced > Screen timeout
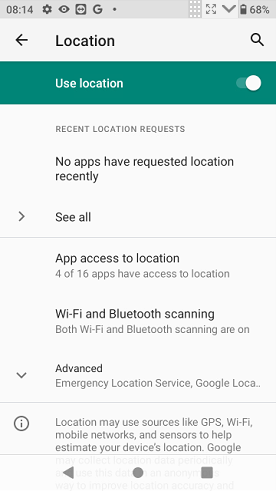
- Enable the Use location permission for the device using the slider:
- Settings > Location
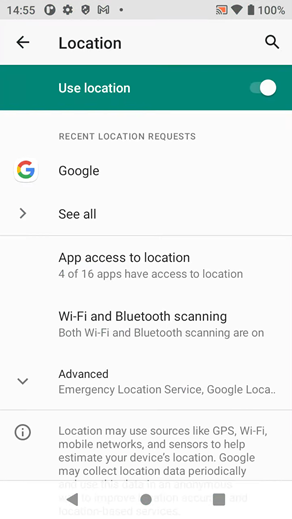
- Settings > Location
- Enable the Wi-Fi scanning and Bluetooth scanning permissions for the device using the sliders:
- Settings > Location > Wi-Fi and Bluetooth scanning
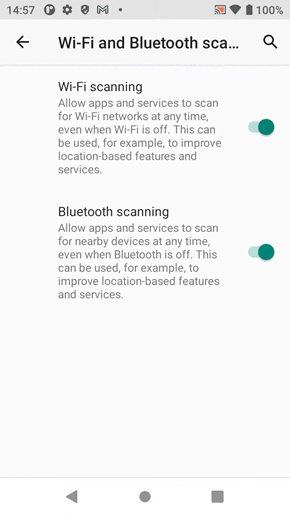
- Settings > Location > Wi-Fi and Bluetooth scanning
- Disable the Usage & diagnostics setting on the device using the slider:
- Settings > Privacy > Advanced > Usage & diagnostics
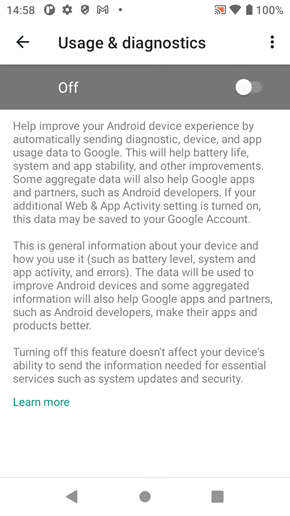
- Settings > Privacy > Advanced > Usage & diagnostics
- Set the Unitech Scanner Service to Factory Default:
- Settings > USS (Unitech Scanner Service) > (choose the Factory Default menu option)
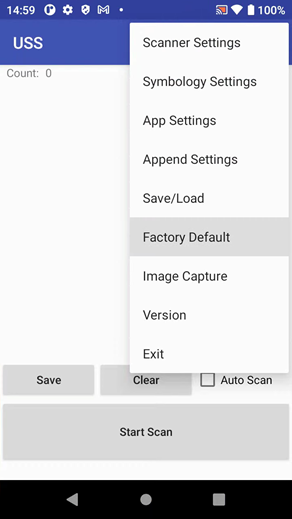
- Settings > USS (Unitech Scanner Service) > (choose the Factory Default menu option)
- Setup the On-screen keyboard:
- Settings > System > Languages & input > On-screen keyboard > Gboard > Preferences
- Number row: Enabled
- Show emoji switch key: Disabled
- Show emojis in symbols keyboard: Disabled. Note: skip if option is not present
- One-handed mode: Off
- Keyboard height: Short
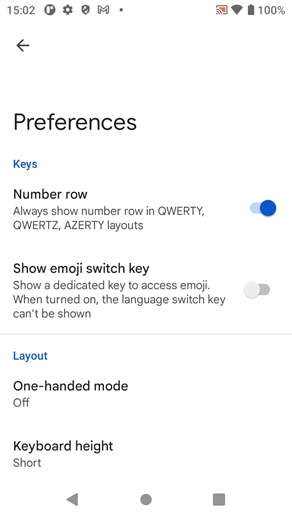
- Settings > System > Languages & input > On-screen keyboard > Gboard > Preferences
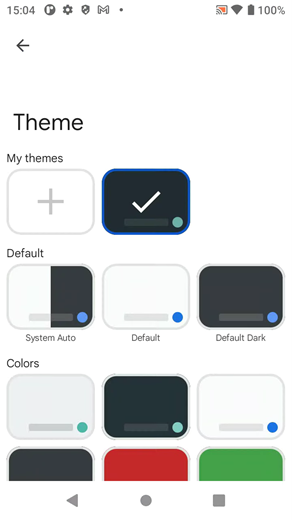
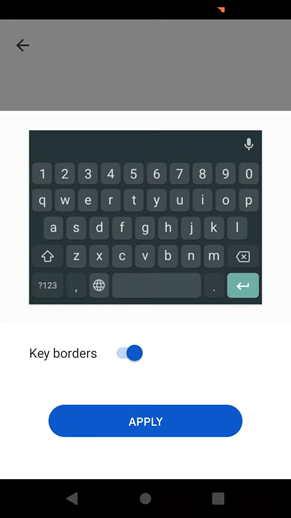
- Change the Keyboard Theme to the "black with turquoise dot" option (most likely the second option in the first row of the Colors section).
- When selecting this option, ensure Key borders are enabled using the slider:
- Settings > System > Languages & input > On-screen keyboard > Gboard > Theme
- For all four Volume settings, change the level to approximately 20%:
- Settings > Sound
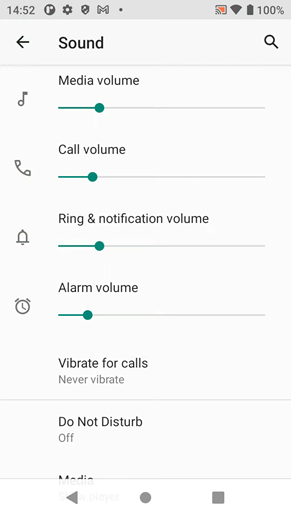
- Settings > Sound
Install AscendScan
- Download the AscendScan installer (.apk) file to your computer.
- Connect the EA520 to the computer via the USB cable.
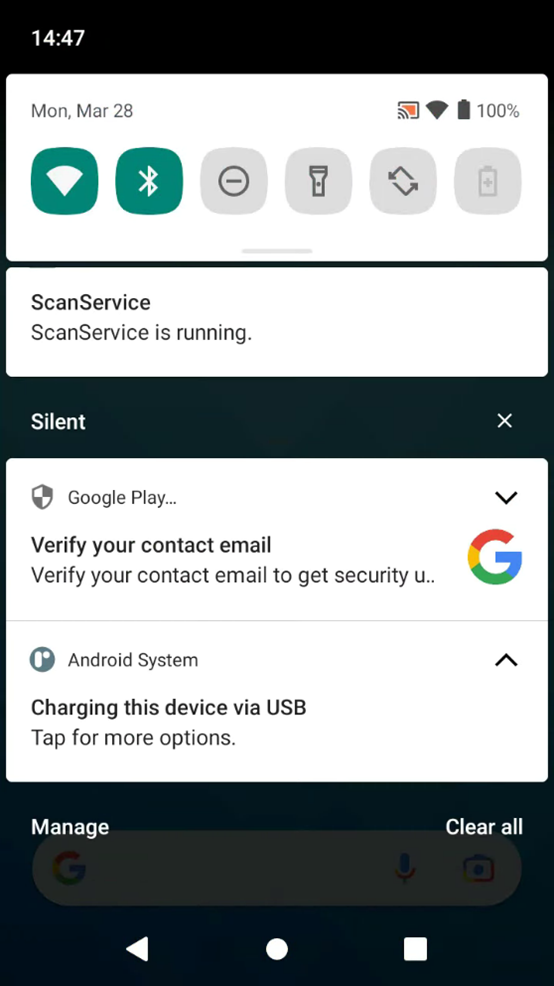
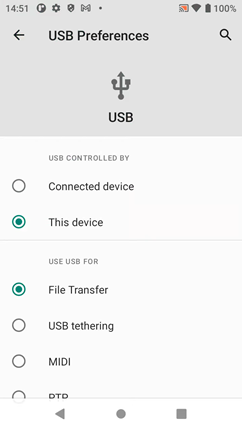
- Enable the File Transfer capability by swiping down from the top of the device’s screen.
- Change the current Charging this device via USB setting to the File Transfer setting (tap as indicated to see this option).
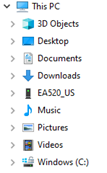
- From your computer, open Windows Explorer. There should now be an entry for the EA520 device.
- Make sure the AscendScan.#.#.#.apk file is in an accessible location on the computer.
- Copy the AscendScan.#.#.#.apk file on the computer to the Internal Shared Storage > Download folder on the EA520 device.
- Install the AscendScan app (but DO NOT start the app):
- Open the Files app on the EA520.
- Navigate to the Downloads folder.
- Tap on the AscendScan.#.#.#.apk file to initiate the installation process.
- After the installation is complete, DO NOT select the option to open the app.
- Setup the following Permissions for AscendScan:
- Settings -> Apps & notifications -> tap "SEE ALL ## APPS" -> AscendScan -> Permissions
- Camera: Only while app is in use
- Files and media: All Files
- Location: Only while app is in use
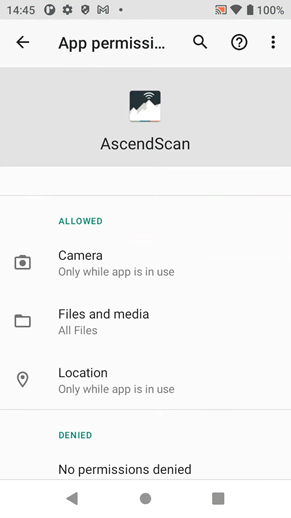
- Settings -> Apps & notifications -> tap "SEE ALL ## APPS" -> AscendScan -> Permissions
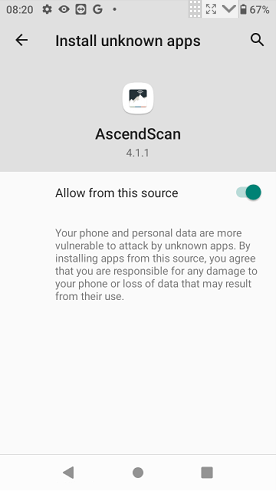
- Enable Allow from this source on the Install unknown apps page for AscendScan using the slider:
- Settings > Apps & notifications > Advanced > Special app access > Install unknown apps > AscendScan
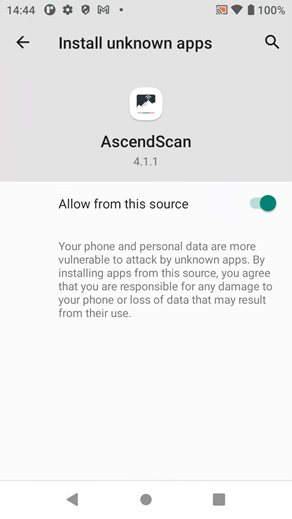
- Settings > Apps & notifications > Advanced > Special app access > Install unknown apps > AscendScan
AscendScan Setup
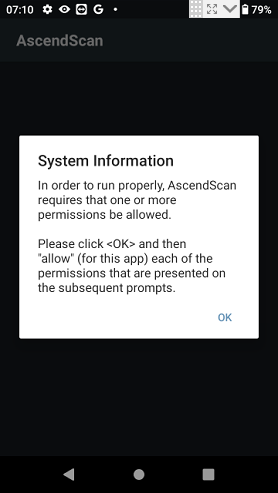
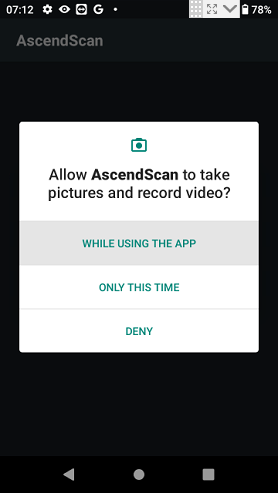
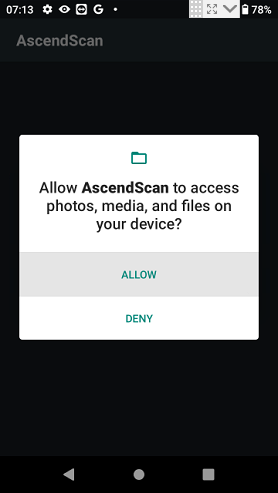
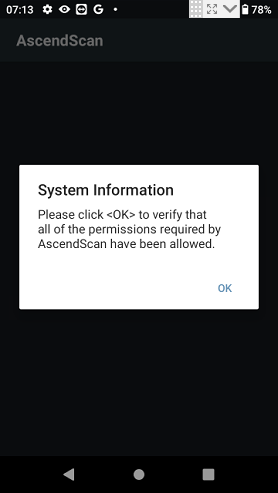
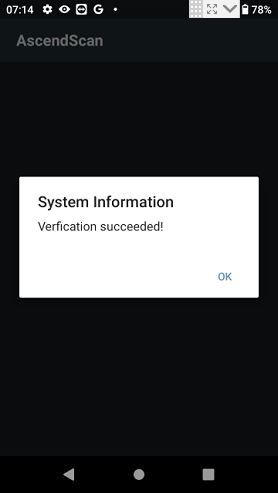
After starting AscendScan, the following permissions prompts may appear.
- Select OK to continue
- Select WHILE USING THE APP for the pictures and record video permission request
- Select WHILE USING THE APP for the device’s location permission request

- Select ALLOW for the photos, media, and files permission request
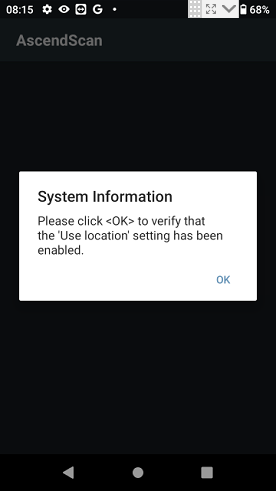
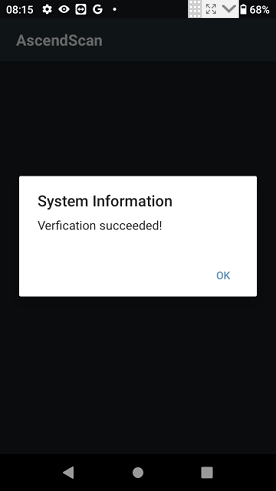
- Verify that the required permissions for AscendScan have been set by clicking OK on the next two verification screens
- The Use location permission must be enabled from the device’s Location page

- Navigate back to AscendScan and verify that the Use location setting has been enabled
- From AscendScan, navigate to the Utilities > About Page.
- Select the CHECK FOR UPDATES option.
- This may lead to a prompt that pulls up the Install unknown apps permission.
- Use the slider to Allow from this source on the Install unknown apps page.
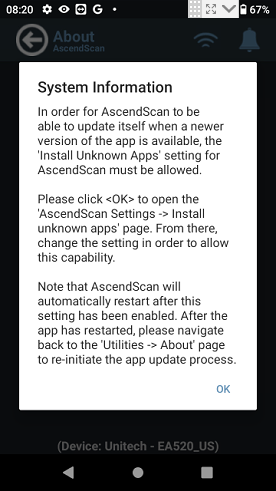
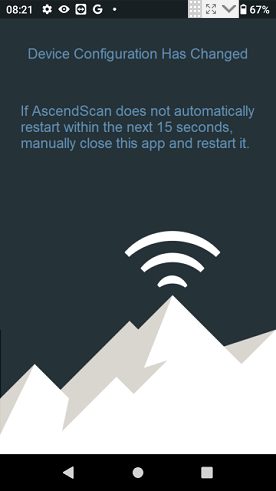
- Note that after enabling the Install unknown apps setting and navigating back to AscendScan, the app will automatically restart.
- Navigate back to the Utilities > About page to re-initiate the app update process
- Navigate back to the Utilities > About page to re-initiate the app update process
Desktop Setup
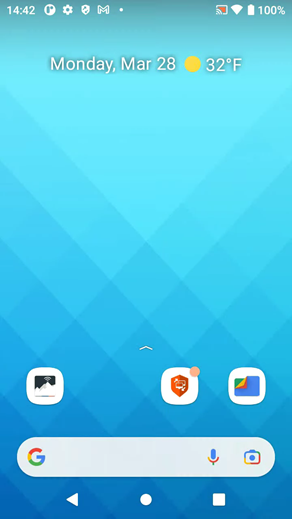
- The AscendScan icon should be in the lower left of the display.
- The Files icon in the lower right.
- The BeyondTrust Support app icon just left of the Files icon.
- Remove (but do not uninstall, if prompted) all the other icons from the desktop.
You're now ready to install BeyondTrust!
BeyondTrust is a remote tool Ascend Support can use to see what you see on your device. This helps immensely with troubleshooting.
Only purchase scanners from your trusted Ascend Business Development Team.
If the EA520 scanner is purchased from a 3rd party supplier, there's the possibility that the scanner will not function correctly. In addition, there would be an additional charge for the AscendScan application.
Please contact the Ascend Business Development for more information (sales@ascendrms.com).