
Promotions in Ascend make it easy for you to quickly discount specific products or categories for your customers.
Create a promotion manually
- Select View > Promotions from the Ascend Desktop.
- Click the Add icon just below the search bar near the top of the screen.
- Select your Promotion preferences including: Type, Description, Start Date, and End Date.
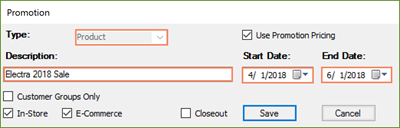
- Click Save to record your settings and create your Promotion.
Promotions can be limited to:
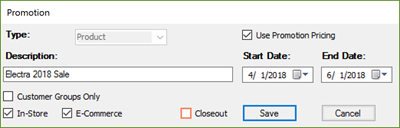
- Customers in a specific Customer Group by checking the Customer Groups Only box. Please note that this is a permanent option and cannot be undone once the Promotion is saved.
- All customers who physically visit your store by checking the In-Store box.
- Specific locations by checking the Use Promotion Pricing box.
Note: Use the Closeout option to help move older product off your shelves. Closeout Promotions don't expire until the product sells out.
Download a Promotion using the Promotion Wizard
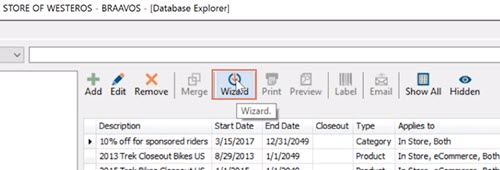
- Select View > Promotions from the Ascend Desktop.
- Click the Wizard icon.
- The Promotion Wizard window opens. Highlight a Promotion here, and view the included products for that promotion on the bottom.
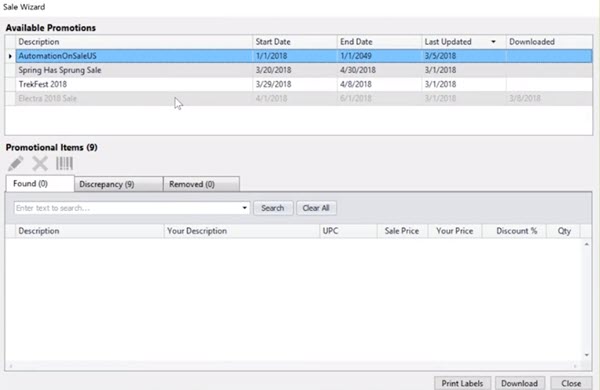
- You can highlight individual products in the promotion to:
- Edit the Product record,
- Remove the item from the promotion,
- Or print a product label.
If you remove a product from the sale, it appears in the Removed tab over here, so you can always keep track of them. And if you accidentally remove a product you didn't intend to, you can Restore products.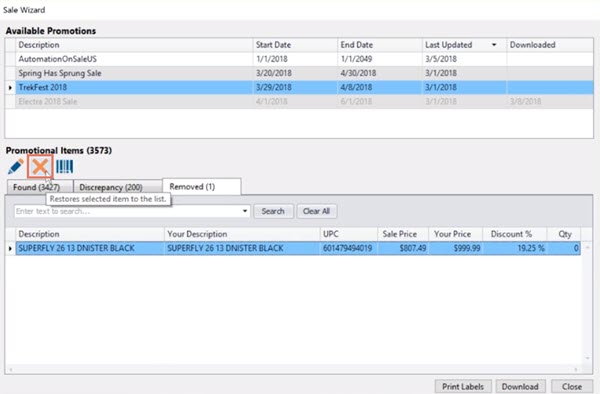
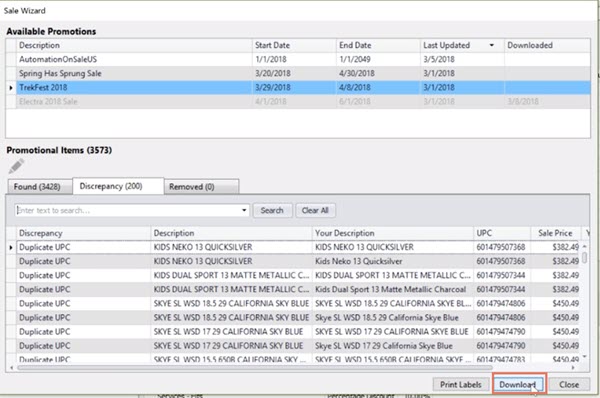
There’s also a tab for Discrepancies, which will include any products in the sale that don’t exist in your Ascend system or that have duplicate UPCs. For duplicates, you can edit the product record from here to fix any issues.
- When you’re ready, click Download to add the sale promotion to your database.
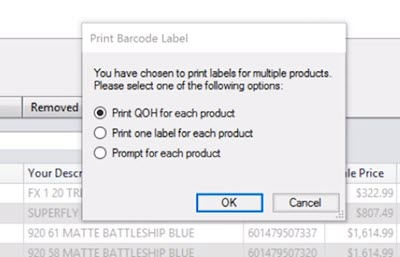
- Click the Print Labels icon to print a set of labels for all items in your new Promotion. Select the number of labels you want, or select this button so you can confirm each item one at a time before printing.
- Click Close when you're done.
Additional resources
KB22-136