
If you are looking for a more in-depth walk through the Work Order Details screen, please check out our article, Service - Walk through the Work Order Details Screen.
Creating the Work Order / Repair
There are two easy ways to start a new work order.
- From the Ascend Desktop, click the Work Order tile.

- From the Service Center screen, click the Add button (on the toolbar).

Associate or Add Serialized Item/Customer
On the Enter Serial Number prompt scan or type the serial number associated with the repair item and click OK. If the serial number was sold through Ascend, the appropriate customer is automatically associated with the work order and repair.
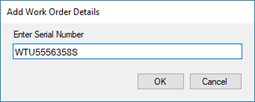
- If the item doesn’t have a serial number, you’re creating the work order prior to the customer brining the item into the store, or the serial number on the product wasn’t recognized (above), click Cancel, then search for the appropriate customer.
- If you need to add a new customer, check out our article Customers - Create.
- If you scanned a recognized serial number, the Customer, Serial #, and Description fields automatically populate.
- If you only chose the customer, you’ll need to choose or create the repair item.
- Note: If you're assembling an item for a customer, DO NOT create a new repair item. See Assemble a product for a customer (bike builds) for details.
- If the product was serialized and sold or previously serviced through Ascend, just click the Description drop-down and choose the appropriate item.
- Note: In order to use the Multi-Point Inspection form (Inspection tab) you must have a serial number associated with the repair item.

If the item doesn’t exist there, click the plus icon next to the Serial # dropdown to add a new repair item.

Enter a meaningful Description (e.g. Trek Skye Purple Lotus 18.5-29 instead of Purple MTB), Serial Number (if applicable), and Where Purchased (if desired). Then click Save. Serial Number is required if you would like to use the Inspection (MPI) form.

Note: While a repair item is not required, it’s best to enter one for all repairs and service so that the technicians can quickly identify what they’re working on.
If you'd like to learn more about using the Multi-Point Inspections (MPIs) form, check out our article: Service - Multi-Point Inspections (MPIs).
Filling in the Work Order Details Screen
Note: Contact Preferred Removed in 25.13 (released 11/12/25). It was discovered that “When THIS REPAIR is completed” was not triggering the auto-prompt for communication with the customer. The decision was made to remove the dropdown option as it does not work as intended. You will continue to receive the auto-prompt to notify customers once all REPAIRS/WORK ORDERS are completed. Call If Over has been moved over in its place.

- Call If Over: Enter the maximum amount quoted to the customer for the repair. Technicians should contact the customer for approval if they believe the repair will require more service than quoted.
- Save Old Parts: If your store (or the customer) wishes to retain parts removed from the repair item.
- Assemble Item: Check if the product is new and needs to be put together.

- Use the Quickies buttons to add labor/service/parts items. Or Scan or type all required parts and labor/service items into the search box.
- If you pull any parts be sure to scan them into the Work Order Details screen so they are deducted from your current inventory.
- For any product that is not in your current inventory, you will receive the Special Order prompt. For more information on Special Orders, check out our article, Sales - Special Orders.

- Ticket #: Automatically populates.
- Subtotal: Displays all entered items without tax calculated.
-
Estimated Time: The number of minutes automatically populates in the Est. Time field.
- This field may also be manually overridden if you feel that the repair will take longer than a standard repair of its type.
-
Internal Notes: Enter as much detail as possible about the customers concerns and expectations. There’s no character limit for this field.
- Check Print Internal Notes on Sales Receipt to print this information on both the customer’s receipt and the ticket for the service technicians.

Scheduling Work Orders / Repairs
- Start Date: Automatically assigns the date the Work Order is created.
-
Due Date: To select a Due Date click View Availability.
- From the View Availability screen you can assign the Work Order to a Technician or the Total Available Unassigned Time bucket.
-
Advisor: Automatically populates with the user who created the repair.
- However, if someone else discussed the initial repair and estimate with the customer, select their name
- Technician: Assigned through View Availability.

Note: If you’re scheduling work orders only by the number your technicians can finish in a day, enter the date and time the customer expects the repair to be done by in the Due Date field. If a specific technician will be working on the repair, select them from the Technician drop-down.
- Checked By: If a second user gives the repair item a once-over to ensure nothing was missed, select that user from the Checked By drop-down.
- Status: Select the appropriate Status drop-down.
-
Space: Select the location of the repair item.
- Spaces which display in italic orange text are in use on another repair and cannot be selected. Spaces which display in italic blue are in use on a serial number and may be used, if the items are the same. To clear the value from the Space field, click the minus icon next to the field.
- Important: If the repair should be prioritized, check Important.
- Warranty: If the repair is associated with a manufacturer's replacement, check Warranty.

- Click Save & Print from within the Work Order Details Screen to print a copy of the ticket to attached to the repair item.
- From the sales/transaction screen click Save to print a receipt copy for the customer (if needed).

- All repair items and tax totals display on the transaction screen. Take payment according to your store’s down payment policy – but if you’re taking full payment, be sure to click the Keep Open button on the toolbar to ensure the work order doesn’t get lost!

Adding Additional Work Order / Repair Items
If the customer has more than one repair they’ll be paying for, there’s no need to create multiple transactions.
- Click the arrow next to the WO Detail button (on the toolbar) and select Add New Work Order Details.

- You’ll again be prompted for the serial number – scan or enter it is available, or click Cancel.
- The customer who owns the bike doesn’t need to be the same as the initial customer – if necessary, click the magnifying glass icon next to the Customer field and associate the correct customer.

Updating the Work Order / Repair
There are a couple of ways to access open Work Orders.
- From the Ascend desktop click Service Center tile and double-click the repair item.

- Click the Finish Sale tile and scan the barcode on the bottom of the receipt/ticket to reopen the Work Order.

- Navigate to desired Work Order and double-click the repair item (if you used Finish Sale tile the specific Work Order will open automatically).
- The Work Order Details automatically open until the Work Order is marked as Completed.
- Tracking Time:
-
Timer: To begin tracking the time spent working on the repair, click the play icon next to the Timer field.
- The timer continues to run when Work Order Details is closed.
- To end time tracking, click the stop icon next to the Timer field. The Actual Time field automatically updates.
-
Timer: To begin tracking the time spent working on the repair, click the play icon next to the Timer field.

- Add any additional labor/service SKUs/Products and/or Internal Notes.
- Change Status as needed.
- Actual Time may also be manually updated.
- When you’re done, click Save (or Save & Print, if you want a new copy of the ticket for the repair item).
Completing the Work Order / Repair
- From Service Center, double-click the repair item. The repair’s Work Order Details automatically open.
- After making any final updates, check Completed.
- Click Save (or Save & Print, if you want a new copy of the ticket for the repair item).
- Note: Ascend has no idea the Work Order is Completed until the Completed box is checked.

If you’ve selected to automatically notify customers on work order completion, once you click Save in the transaction screen, an email and/or SMS (text) message displays to send based on your selection for Contact Preferred. Leave the default text or enter your own.
If a second user gives the repair item a once-over to ensure nothing was missed, select that user from the Checked By drop-down. When you’re done, click Save.
The transaction remains open until the customer returns to pick up the item(s) and pays in full.
Customer pickup
Access work orders that are marked Complete but have not yet been finished (closed).
- On the Ascend Desktop, click the Service Center tile.

- From the Ascend Desktop, select the View menu > Service Center.

- From the Service Center screen, select Ready from the top right-hand corner

Double-click the repair item. The transaction screen will open and is ready to take payment. If you'd like more information about taking payment, check out our video, Process Payments in a Transaction.
Additional Resources
KB22-046