
Create a Batch Transfer
Batch Transfer can be used to expedite the transfer of a large amount of products to another location using your inventory scanner.
Use Smaller Batches for Increased Data Integrity
We recommend limiting batch transfers to less than 500 products at a time to reduce the chance of any communication disruption resulting in a partially sent transfer.
![]()
- Create an Inventory Event (e.g.: Transfers to KFlo's Bikes Madison).
- Note: You will not reconcile this event, it will be used to create the file needed for Batch Transfer.
- Check out our article, Inventory Center - Creating and Navigating Inventory Events for steps on creating an inventory event.
- Scan all products being transferred to a specific location using your inventory scanner (EA500, EA520, or EA660).
- Once all products are scanned we will run a custom query (below) to get the results from the scanned file(s).
-
Ascend desktop > Reports > SQL Query
- Note: Check out our article, Reporting - How to Run a Custom Query if you are unfamiliar with running a custom query.
WITH SerialNumberScans
AS
(SELECT InventoryScan.ItemID, Products.TopicID, [Topic] = Categories.Topic, [ProductID] = Products.ID, Products.Description, Products.UPC, [SKU] = PRoducts.[Store UPC]
FROM InventoryScan
LEFT JOIN SerialNos on InventoryScan.ItemID = SerialNos.Id
LEFT JOIN Products on SerialNos.ProductID = Products.ID
LEFT JOIN Categories on Products.TopicID = Categories.ID
WHERE InventoryScan.DateCreated BETWEEN <<StartDate>> AND <<EndDate>>
AND InventoryScan.ScanType = 1
AND InventoryScan.Hide = 0)
SELECT [Qty , UPC/SKU] = CAST(InventoryScan.Count as nvarchar) + ',' +
CASE
WHEN InventoryScan.ScanType = 1
THEN Coalesce(NULLIF(SerialNumberScans.UPC,''),SerialNumberScans.SKU)
ELSE Coalesce(NULLIF(Products.UPC,''),Products.[Store UPC])
END
,[SectionNumber] = InventorySection.Number
FROM InventoryScan
LEFT JOIN InventoryGroup ON InventoryScan.InventoryGroupId = InventoryGroup.ID
LEFT JOIN InventorySection ON InventoryGroup.InventorySectionId = InventorySection.ID
LEFT JOIN InventoryEvent ON InventorySection.InventoryEventId = InventoryEvent.ID
LEFT JOIN Products ON InventoryScan.ItemId = Products.ID
LEFT JOIN SerialNumberScans ON InventoryScan.ItemID = SerialNumberScans.ItemId
WHERE InventoryScan.DateCreated BETWEEN <<StartDate>> AND <<EndDate>>
AND InventoryScan.Hide = 0
ORDER BY InventorySection.Number- Export the results to an XLSX file, and open it in Excel, Google Sheets or Excel online.
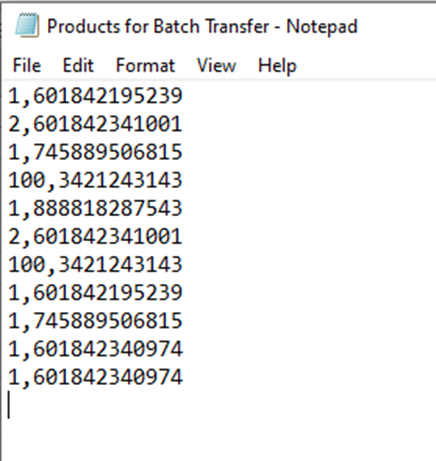
- Copy the column titled ‘Qty, UPC/SKU’ without the header.
- Paste the column into a blank Notepad.
- Save the document.
- In Ascend navigate to Check-Out Transfers.
- Click on the Batch Transfer icon to find and select your document.
![]()
- In the Batch Transfer prompt, select the location you want to transfer the products to.
- Click OK.

- If there are any errors during the import, you’ll receive a popup letting you know. Otherwise, the items will simply be added to your Check Out Transfers window.

- Complete transfer process as usual.
Note: If you’ve scanned products with an MC2180* inventory scanner, the scan file created is already in this format. The MC2180 device is unsupported by the Ascend support team.
KB25-017