
Help keep vendor costs and suggested retail pricing accurate using Ascend.
If you’re a multi-store retailer, pricing changes automatically share between locations (if you’ve chosen to do so).
Always back up your Ascend database before importing product spreadsheets. Previous information cannot be recovered without a backup.
Before you go through this manual process, have you checked out our Ascend HQ Price Update Tool? If not, check out our article, Ascend HQ - Price Update Tool . The article also contains a how to video under Additional Resources.
Considerations for items ordered in bulk (case quantity)
Some vendors/suppliers may provide MSRPs for only the entire case – not individual items. If you have already spent time and energy setting up your Case Qty/Bulk products, we encourage you to remove those items from the spreadsheet prior to importing it through this process.
- Download the appropriate vendor/supplier list from Ascend Retail Portal (ShareFile).
- Open the spreadsheet in Microsoft® Excel (or other spreadsheet program).
- Sort the CaseQty column by Largest to Smallest values (this brings all “bulk” products to the top of the list).
- Note: Be sure to sort the entire spreadsheet – when prompted, select the Expand the selection option.
- For each product, verify the MSRP value is accurate for individual items.
- Adjust MSRP values as needed, or remove the row from the spreadsheet and update the product manually.
- Note: Be sure to remove the entire row – if there’s a blank row in the spreadsheet, the import will stop at that row, and any products after it will not be updated.
- Save and close the spreadsheet.
Use the supplier’s suggested information
Updating supplier pricing will also overwrite other product information, such as supplier product descriptions and case quantities. DO NOT USE THIS METHOD IF YOU USE CUSTOM PRICING, DESCRIPTIONS, CASE QUANTITIES, OR OTHER INFORMATION.
- Head to the Retailer Portal > Vendor/Supplier Product Files for your country on www.ascendrms.com
- Note: This page requires a login – this account is NOT tied to your Ascend account, so if you haven't received an invite, submit a request for an account.
- Locate the supplier and download the most recent pricing file for your cost/price level combination.
- Note: If the supplier provided us with details on the price changes, we’ll post a spreadsheet with only the changed products. Download and import this spreadsheet only if you use ALL of the supplier’s recommended values.
- Save this file to a locations you’ll remember (e.g. the Windows Desktop).
- From the Ascend Desktop, click the Options tile.

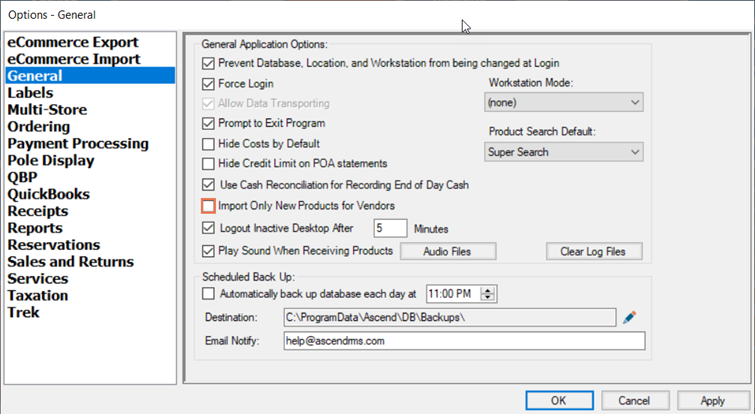
- Select the General tab, uncheck Import Only New Products for Vendors, and click the OK button.
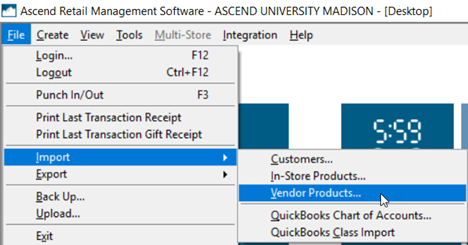
- From the Ascend Desktop, select the File menu > Import > Vendor Products.
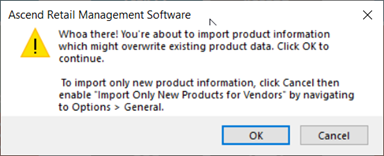
- On the Overwrite existing product data prompt, click the OK button.

- Navigate to the location where you saved the file and double-click the file.
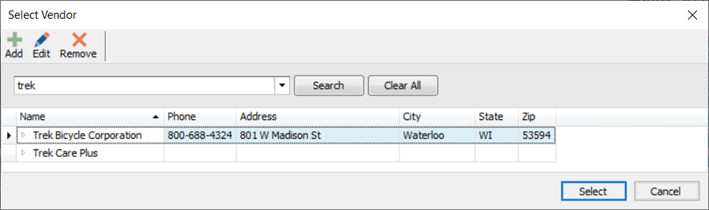
- On the Select Vendor dialog box, double-click the vendor/supplier you are updating.

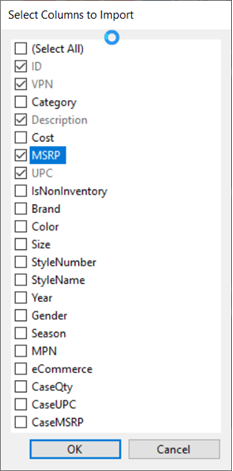
- On the Select Columns to Import dialog box, check the columns you wish to update and click the OK button.
-
Note: ID, VPN (vendor/supplier part number), Description, and UPC are required and cannot be unchecked.
Cost and Description only apply to the vendor product record: - In-store product costs are based on either Average Cost (if the product has receiving or adjustment history) or Estimated Cost. Estimated Cost can be changed using an In-Store Product Export; Average Cost can be manually recalculated. Article: Products - Fix Average Cost.
- In-store product descriptions can be changed using an In-Store Product Export.
-
Note: ID, VPN (vendor/supplier part number), Description, and UPC are required and cannot be unchecked.
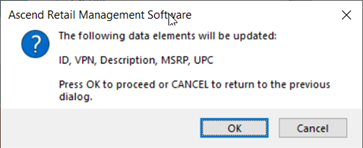
- On the Data elements will be updated prompt, click the OK button.
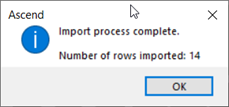
- The import progress displays. When complete, the Import process complete prompt displays the total number of products updated – click the OK button.
- From the Ascend Desktop, click the Options tile.

- Select the General tab, RECHECK Import Only New Products for Vendors, and click the OK button.
-
Note: Leave this option checked at all times, only unchecking it when updating products, to ensure you don’t accidentally overwrite product information.

-
Note: Leave this option checked at all times, only unchecking it when updating products, to ensure you don’t accidentally overwrite product information.
Use your own (custom) information
- Head to the Retailer Portal > Vendor/Supplier Product Files for your country on www.ascendrms.com
- Note: This page requires a login – this account is NOT tied to your Ascend account, so if you haven't received an invite, submit a request for an account.
- Locate the supplier and download the most recent pricing file for your cost/price level combination.
- Note: If the supplier provided us with details on the price changes, we’ll post a spreadsheet with only the changed products.
- Save this file to a locations you’ll remember (e.g. the Windows® Desktop).
- Open the spreadsheet in Microsoft® Excel (or other spreadsheet program). Make edits as required.
- If you do not wish to update a product, remove the entire row – if there’s a blank row in the spreadsheet, the import will stop at that row, and any products after it will not be updated.
- You may also remove columns if you do not wish to update that field.
Note: ID, VPN (vendor/supplier part number), Description, and UPC are required and cannot be removed.
- Save and close the spreadsheet.
- From the Ascend Desktop, click the Options tile.

- Select the General tab, uncheck Import Only New Products for Vendors, and click the OK button.

- From the Ascend Desktop, select the File menu > Import > Vendor Products.

- On the Overwrite existing product data prompt, click the OK button.
- Navigate to the location where you saved the file and double-click the file.
- On the Select Vendor dialog box, double-click the vendor/supplier you are updating.
- On the Select Columns to Import dialog box, check the columns you wish to update and click the OK button.
Note: ID, VPN (vendor/supplier part number), Description, and UPC are required and cannot be unchecked.
- On the Data elements will be updated prompt, click the OK button.

- The import progress displays. When complete, the Import process complete prompt displays the total number of products updated – click the OK button.

- From the Ascend Desktop, click the Options tile.

- Select the General tab, recheck Import Only New Products for Vendors, and click the OK button.
- Note: Leave this option checked at all times, only unchecking it when updating products, to ensure you don’t accidentally overwrite product information.

Printing new labels
(multi-store retailers) This query needs to be run separately at each location.
- Download and run the Modified products for labels query (see Reporting - How to Run a Custom Query). Select the date range in which you updated the products to be relabeled.
Note: If a product is available from multiple vendors, that product will display as a separate line for each vendor. - If you edited products for multiple vendors and do not wish to reprint labels for all of them, filter the results to the desired vendor (or other criteria).
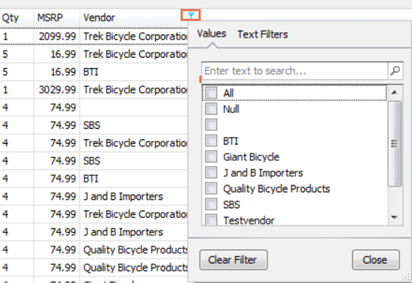
- Hover your cursor over the header for the column you wish to filter and click the funnel icon.
- Check the values you wish to display.
- Note: For advanced filtering options (e.g. text containing a partial value), select the Filters tab instead of Values.
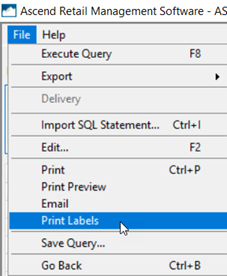
- Select the File menu > Print Labels.
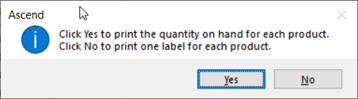
- On the Quantity to print prompt, select the quantity of labels you wish to print for each product.
- Yes: Print labels for your current in-stock inventory value for each product.
-
No: Print a single label for each product.
KB22-069