
The label audit can be the most labor-intensive part of your Ascend installation. The goal of the Label Audit is to make sure every product in your store is accurately entered in Ascend, ensuring that:
- All products in your store have a label that can be scanned and recognized in Ascend.
- The MSRP on the product labels match the MSRP in Ascend.
- The correct product description comes up when you scan the label.
A label audit prepares you for both a full-store inventory before your go-live with Ascend and future success with the Ascend program.
Prior to your label audit, you will have an 1-2 hour training session with your installer. Here’s how you can prepare for it:
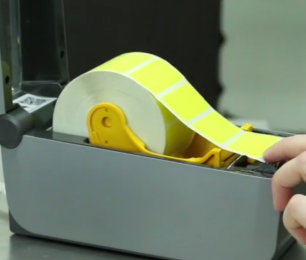
Prepare your (Zebra ZD410) Label Printer
- Remove the printer and cords (one black, two-piece power cord and one white USB cord) from the box and place next to the computer.
- Load a roll of labels face-up into the printer.
- Do NOT plug in the printer.
Your installer will walk you through the Install the label printer process during your training session.
Prepare your Inventory Scanner
- Remove the scanner, USB cord, and grid sled (if you ordered one) from their packaging and place next to the computer.
- Plug the USB cable into the back of the computer or USB wall adapter. Note: Other USB ports (e.g. on the computer monitor, the front of the computer, a USB hub) may not receive sufficient power to charge the device quickly.
- Plug the other end of the USB cable into the device and let it charge for 24 hours while powered off.
Your installer will walk you through the install process for your inventory scanner during your training session. Article: Configure the Unitech EA520 Inventory Scanner: Set Up AscendScan and BeyondTrust
After training
You should have all the tools and knowledge you need to complete your label audit!
The amount of time the task takes is completely up to you. We recommend having at least one employee solely dedicated to this task. Like we said, it's labor-intensive and requires a lot of focus and energy.
Your installer will reach out regularly during this phase, but don't hesitate to reach out to them, if needed!
Scanning products
A lot of the scanning process will be similar to a full-store inventory process - only a bit easier, because this is the first time you're adding product quantities to your system! So there aren't any quantity discrepancies to investigate at this time.
Start by following the Two Days and One Day before inventory instructions: Prepare for a full-store physical inventory.
When you're ready to start scanning, create an Inventory Event and connect the inventory scanner to your Ascend Agent program. Article: Using the Inventory Center for Cycle Counts and Full-store Physical Inventory
Then follow the scanning process: Walking through the inventory scanning process for Cycle Counts and Full-Store Inventory.
'Item Not Found' error during scanning
During the scanning process, you may run into the error Item Not Found. The item might not be in your Ascend system. Otherwise, if you can scan it directly into Ascend, but the inventory scanner gives you the Item Not Found error, something else might be up. There are three possibilities:
- You are scanning a Part Number label. This will not be recognized by the inventory scanner. When scanning items directly into Ascend, the system will search through all SKUs, UPCs, and Part Numbers to find your product. The inventory scanner will only recognize an item’s SKU, UPC, or Serial Number label.
- The product file in your inventory scanner needs to be updated. The product has been added to Ascend since you’ve last done this.
- The label is a Serial Number and either the in-store product is missing from Ascend OR you are scanning with an old scanner.
FAQs
Q: What is the difference between an In-Store Product and a Vendor Product?
A: An In-Store Product is the actual product being sold in your store, and has a unique UPC and SKU.
A Vendor Product is what you are buying from a Vendor and uses the same UPC but has a vendor-specific Part Number assigned to it. So an In-Store Product might have multiple Vendor Products attached to it, with differences in Cost, Case Quantity, etc.
When you import Vendor Products, the UPC is used to attach ti to an In-Store Product, if one already exists. if no In-Store Product exists for that Vendor Product, Ascend will create one.
See the comparison chart: In-Store Products vs. Vendor Products
Q: How do I create products in Ascend via spreadsheet?
A: Products can be added via an Excel spreadsheet import.
Ascend has developed a relationship with many vendors and when Ascend receives new product information from vendors, it is posted for dealers to download.
Note: Always do a backup before importing a spreadsheet. Do not hesitate to contact the Ascend Support Line if you have any questions regarding your import!
To import products, do the following:
- Go to the Ascend website,http://www.ascendrms.com.
- Click on Login
- Log in to the website using the name and password your installer gave you (this is country-specific).
- Click Vendor Updates.
This displays all of the vendors that supply us with product information. Any spreadsheet that is posted here is formatted and ready to import into Ascend. - Search the list for the desired vendor. They are listed in alphabetical order.
- Click on the link in the right-hand column for your desired vendor. By default they should end up in the Downloads folder, but you can save the file somewhere else (like your Desktop) if it's more convenient.
- You can open the spreadsheet in Excel to verify that the product information is how you’d like to see it in Ascend.
This is your chance to edit Description, Cost, MSRP, etc. And, if the spreadsheet contains products you will never stock, you can remove those lines from the spreadsheet (so they are not added to Ascend). - On the Ascend desktop, navigate to File > Import > Vendor Products.
- Navigate to the saved Excel spreadsheet, select it, and click Open.
- Choose the vendor from the Select Vendor window and click Select. If the vendor is not listed, click the Add button to create a new Vendor.
- In the Select Columns to Import window, click Select All.
- Click OK.
- Click OK again to confirm the selected fields for import.
Wait while the products are created. This may take several minutes if the vendor file is large. Once the file is imported, Ascend will prompt you with the number of lines imported. Click OK and you can move on to the next vendor!
Q: How do I create a product in Ascend individually?
A: You can create individual products (or Vendor Products) easily in Ascend. Article: Add or edit a product
Q: When should I import a vendor product spreadsheet versus a in-store product spreadsheet?
A: A vendor products spreadsheet should be used for your first initial import of a vendor into Ascend. The vendor product will either map itself to its corresponding in-store product if it already exists in your system or create a new in-store product if it does not.
An in-store products spreadsheet should be used for any mass edits to products that have already been created in your Ascend database. It includes all of the fields that are associated with an in-store product in Ascend.
Here are a few instances in which an In-store products spreadsheet should be used:
- Mass updates to product descriptions
- Mass updates to product MSRPs
- Setting your Mins and Maxs to help expedite ordering
Note: Always do a backup before importing a spreadsheet. Do not hesitate to contact the Ascend Support Line if you have any questions regarding your import.
Q: Some of my vendors aren't featured on the Ascend website. What should I do?
A: Start by contacting your sales rep for that company and encourage them to work with Ascend! We are always willing to work directly with vendors to acquire, format, and post new product lists.
But until they do connect with us, you can request a product spreadsheet from the vendor that includes Part Number, Description, UPC, Cost, MSRP, etc.
That spreadsheet can be formatted for Ascend by using our Vendor Product Spreadsheet. Otherwise, you could email the spreadsheet to the Ascend team at lists@ascendrms.com and we'll format it for you. This may just take longer since we get a lot of requests!
Additional Resources
KB22-206