
Regular full-store inventories and cycle counts are critical to any retail business.
Sometimes, though, you need to ensure the accuracy of a specific product, or a few products, without checking an entire category. This guide illustrates how to perform this task within Ascend.
Before you begin
Create an Inventory Event
- Start by selecting Inventory Center or Tools > Inventory Center from the Ascend desktop.
- In the Inventory Center Event prompt, create a new event
Note
You can also highlight an existing event here, and click Delete to remove it from the list. Be careful. Once deleted, an Inventory Event can not be restored! - Select the radio button for Create New Blank Event. Add an Event name and click Create.
- Add a single section and set your Starting Number to 1.
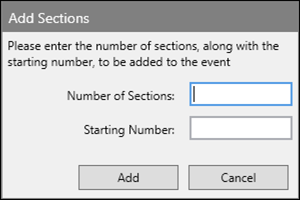
- Then click Add.
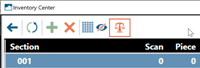
- The event opens in the Inventory Center and you're ready to start scanning.
Scan Products and Reconcile
- Connect your scanner to the Inventory Event.
-
Scan the products in question.
- Make sure to follow the normal rules for scanning and reconciling.
- Scan the product wherever it might live in the shop:
- On the floor
- On displays if they are meant to be sold.
- In the back of the house/storage areas.
- Etc.
- DO NOT scan anything on an open Layaway or Work Order that you're keeping at the shop for a customer.
- On your scanner, upload your counts by returning to the section list and click UPLOAD.
-
In Ascend, click the Reconcile button on the top left-hand corner of the app window.
- Select a non-inventory category, like Labor or Services. This will limit the results to only the products scanned and keep non-scanned inventory off your list.
- Click Continue.
Warning
This will incorrectly adjust products within the chosen category that are not marked as “Non Inventory.” Ensure that the category you've chosen does not have products with current quantity on hand. If you Reconcile without verifying this, be prepared to perform another, longer inventory scan imminently!
- Click Continue.
- Analyze your results.
- Resolve Discrepancies, ignoring “Not in selected Category” for the obvious reason.
- Reconcile.
KB22-121