

Permissions Needed:
Check out our article, Users - Permissions for a Cycle Count or Full-Store Inventory.
Access the Reconcile Screen
- From the Inventory Event, Click the Reconcile icon in the top toolbar

- Next, select the Category/Categories that you have scanned for. If you are doing a full store inventory, select all categories.


Understanding the Reconcile Screen
Top Toolbar

Back
Clicking Back will back out of the Reconcile screen and not save any updates/changes that you have made to New Qty.
Edit
Will allow you to Edit a selected product.
Remove
Will Remove the product from the Reconcile screen.
Analyze
Updates any New Qty changes. Even if you Analyze the results, if you back out of the Reconcile screen and not save any updates/changes that you have made to New Qty.
Will Print all information in the Reconcile screen.
Preview
Will show a Preview of the printout of the Reconcile screen.
Export
Will Export the Results in the Reconcile screen. If you have added filters, it will Export the filter results.
Reconcile
Once you click the Reconcile button, it will update all of the products to the value in the New Qty column.
Columns

Discrepancy Column
Not sure what the Discrepancies are? Head to the Inventory Center - Reconciliation: How to Resolve Discrepancies article for explained and instructions on how to resolve those discrepancies.
Some discrepancies are ok, as you are finding that the Quantity on Hand that Ascend lists is not consistent with the Actual Quantity on Hand.
SKU, UPC, and Description
The In-store SKU, UPC, and Description of the product.
Cost
Cost of the product.
Old Qty Column
The Old Qty column is the quantity on hand that Ascend currently has recorded for that product.
Old Ext. Cost Column
The Old Ext. Cost is the Cost + Old Qty columns.
New Qty Column
The New Qty column is what was scanned during your inventory process. This is what the Quantity on Hand will update to after you Reconcile icon.
Note: Make sure to verify these quantities and changes in quantities before reconciling. Reconciling can not be undone.
New Ext. Cost Column
The New Ext. Cost is the Cost + New Qty columns.
Difference
Cost difference between the Old Ext. Cost and New Ext. Cost.
Category
The Category the product currently lives in.
SO - Not Ordered
Product is marked for Special Order but has not yet been added to an active Purchase Order in Ascend.
SO - On Order
Product is marked for Special Order and has been added to an active Purchase Order in Ascend.
Transfers
Product that has been requested for transfer.
Warranty
Product marked for Warranty.
Committed
Product associated with an active/open Layaway or Work Order.
Scan File
The section(s) the product was scanned in.
Use the Edit Filter
The Edit filter lets you drill down to the Category level and look specifically at products that were not scanned or had an inventory change within that category.
The filter is especially useful when investigating discrepancies in high-dollar categories, such as Bikes.
- Select Edit filter in the bottom right corner of the screen.
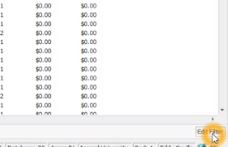
- Select the plus sign in the pop-up window.
- This lets you create a query to find the items you are going to work on.
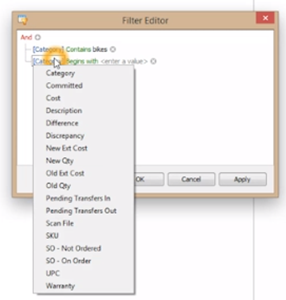
- You can change the blue filter if needed, to one of several options, including Category, Discrepancy, SKU, and more.
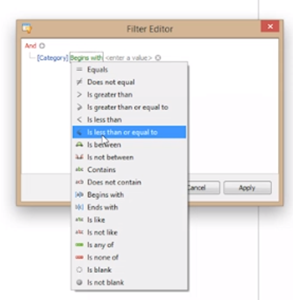
- You can also change the green constraints field to one of several options including begins with, contains, is blank, and more.
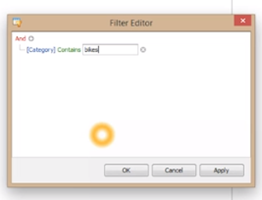
- Now in the gray 'enter a value' field start typing a portion of the Category name (if you chose Category for the blue filter).
- You can select the plus sign again to create another set of filters for your query. You can create as many filters as needed.
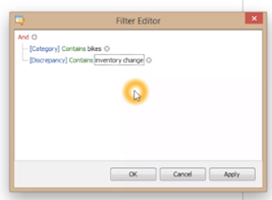
- Once you're done, select OK
- We suggest selecting Export to export the list to excel, where you can print it and use it during your investigations.
- Rename the Excel document and save it somewhere you can find it.
- Delete all columns besides Discrepancy, SKU, UPC, Old Qty, and New Qty.
- Use landscape view to print the file.
10. Go investigate the discrepancies (see the Inventory Center - Reconciliation: How to Resolve Discrepancies article). We suggest keeping notes on your printout, but remember you will need to go back into the Reconcile screen in Ascend to make those changes.
Edit New Qty
You can make updates to the quantity in the New Qty column BUT, once you begin making those changes you CANNOT back out of the Reconcile screen or you will loose those updates.
- Single click into the New Qty field on the highlighted product.
- Edit the Qty.
- When you click out of the New Qty, the highlighted product line becomes bold with italics to indicate a change has been made.
- To save the update, Click Analyze in the top toolbar.

Ready to Analyze and Reconcile?
Check out our article, Inventory Center - Reconciliation: Analyze and Reconcile Inventory