
Ascend software is compatible with Quickbooks. If you want to use Quickbooks for your shop's accounting, you'll need to set up a Company File with the recommended Chart of Accounts (COA).
Ascend's retail accountant team also offers Bookkeeping services for Ascend retailers. Learn more here.
Purchase and Download QuickBooks
Ascend is compatible with QuickBooks Desktop and Online versions. We recommend purchasing one of the following versions:
- QuickBooks Desktop Pro - this version is ideal for retailers who only need a single user login for their accounting software. This version is not currently available to purchase online, but can purchased over the phone. To order, please contact Intuit at 1 (877) 683-3280 and request a license for QuickBooks Desktop Pro.
-
QuickBooks Desktop Premier Plus - this version is ideal for retailers who need up to five user logins for their accounting software and is available to purchase online. To purchase, please follow this link and scroll down to select the latest version of QuickBooks Desktop Premier Plus or contact Intuit at 1 (877) 683-3280 to request a license.
QuickBooks Online Integration with Ascend is available!
Check out our article, QuickBooks - Online Integration for more details.
Set up your account
- In QuickBooks, go to File > New Company.
- Choose Express Start. The Glad you're here window opens.
- Enter your Business Name.
- For the Industry field, select help me choose or Other/None.
- Select your Business Type from the dropdown menu, or click Help me choose if needed.
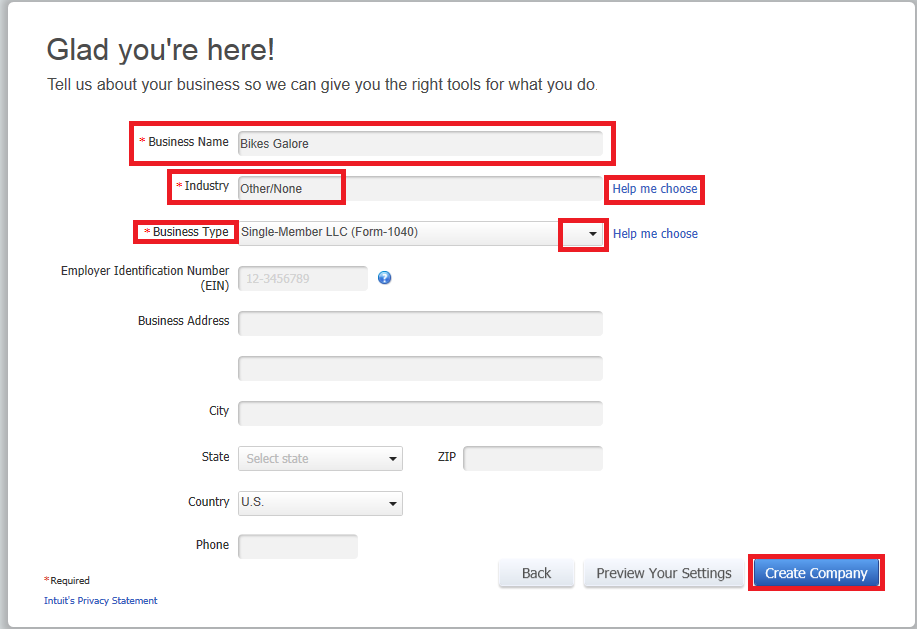
- Fill in any other information as needed.
- Select Create Company. It may take a couple minutes for the file to be created.
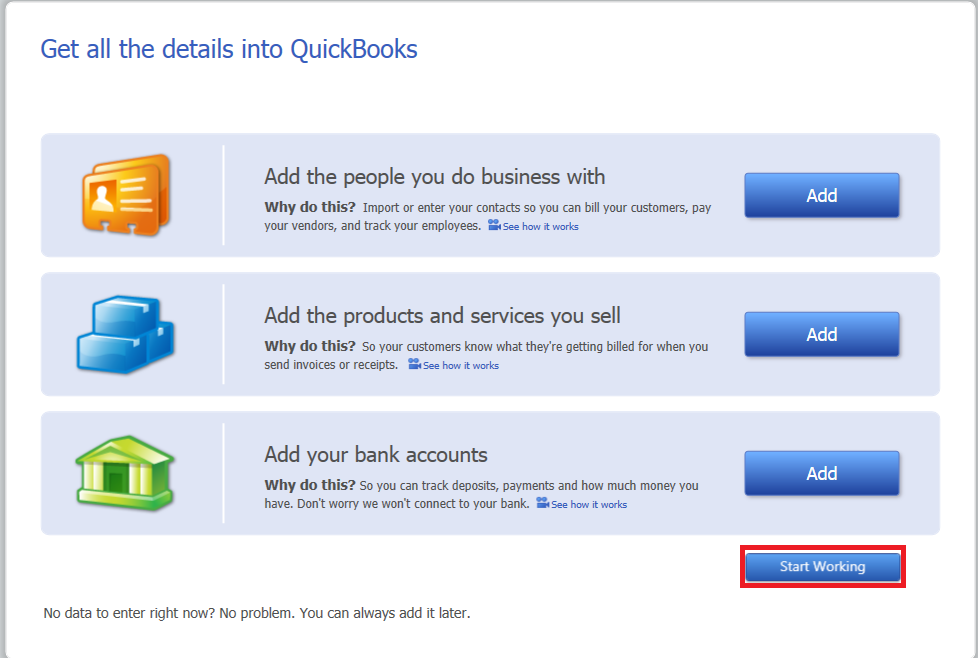
- Once it's created, select Start Working.
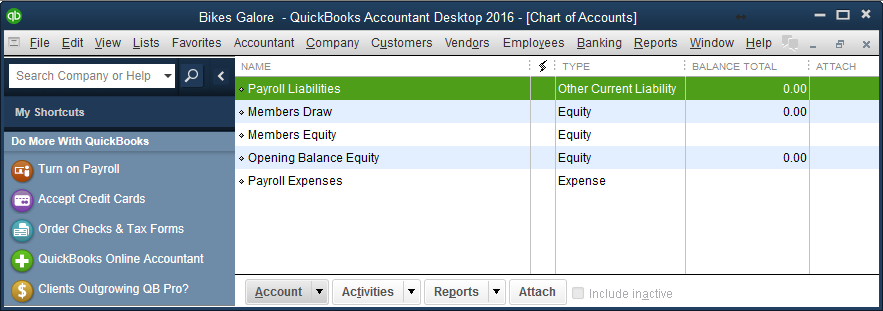
- Click on the Lists tab to view your Chart of Accounts (COA).
- You should see five accounts:
- Payroll Liabilities
- Members Draw
- Members Equity
- Opening Balance Equity
- Payroll Expenses
Configure your COA
Now it's time to import the recommended Chart of Accounts (COA). Be sure to use the correct one; there is one version for single stores, and one for multi-store locations.
- In Quickbooks, go to Files > Utilities > Import > Excel Files. The Add or Edit Multiple List Entries window opens.
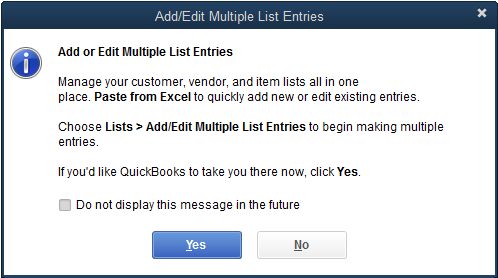 +
+ - Click No. The Add your Excel data to Quickbooks window opens.
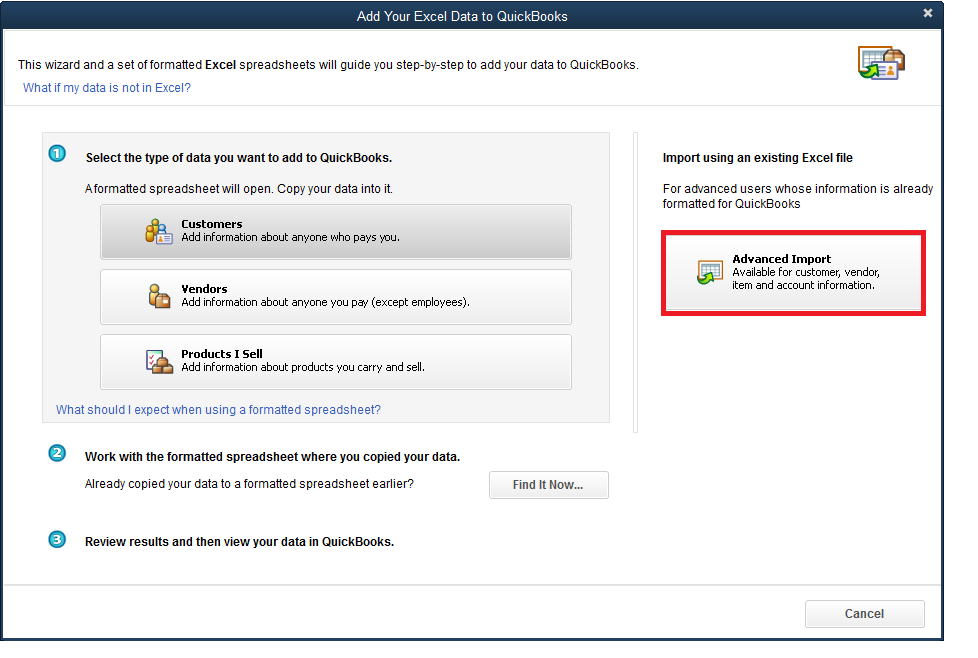
- Select Advanced Import. The Import a File window opens.
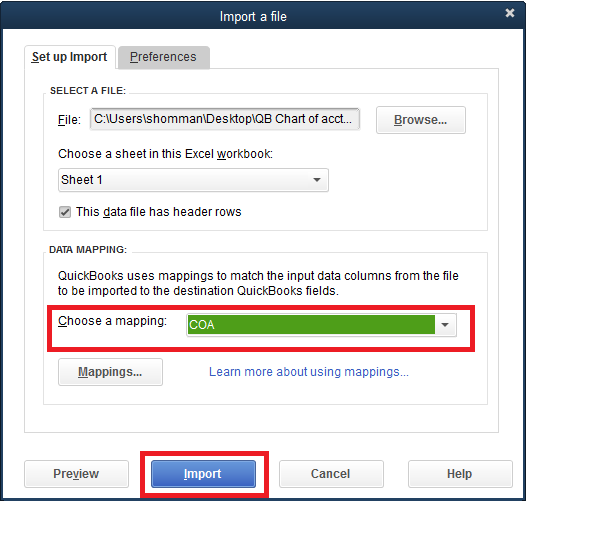
- Click Browse to navigate to the location you saved your COA. Select the COA.
- Choose Sheet 1.

- Under Choose a mapping, select Add New. The Mappings window opens.
- Add this information:
- Select COA for Mapping Name.
- Choose Account for Import type.
- For Type, select ACCNTTYPE.
- For Number, select ACCNUM.
- For Name, select NAME.

- Select Save.
- Back on the Import a file window, the Choose a mapping field should be filled in.
- Select Import.
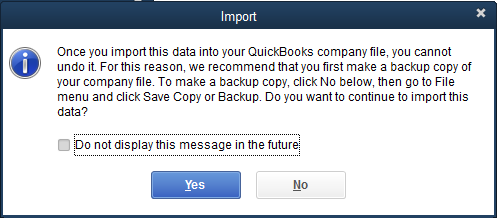
- Select Yes to confirm the import on the Import window.
- The Duplicate records found window opens. This is totally normal!
- Just check the circle for Replace existing data with import data, ignoring blank fields.
- Select Apply to All.

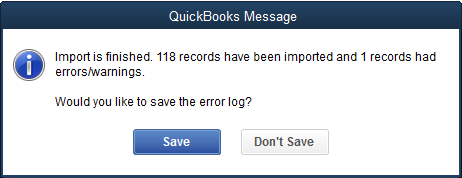
- A prompt will appear asking if you'd like to save the error log. Select Save if you'd like to save it, or Don't Save if you do not.
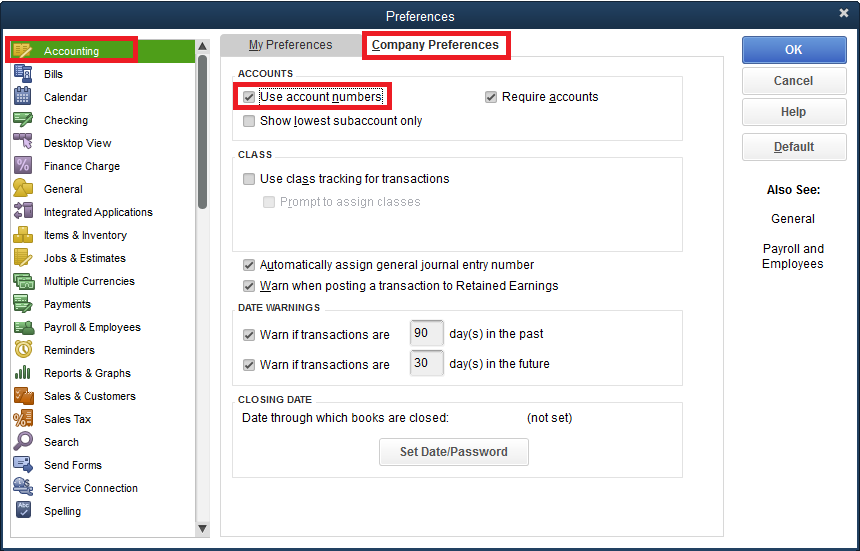
Turn on Account Numbers
In order for Quickbooks to work with your Ascend software, you need to turn on the account numbers.
- In Quickbooks, navigate to Edit > Preferences > Accounting > Company Preferences.
- Check the box for Use Account Numbers.
- Select OK.
- Now you should delete (or make inactive) the five original accounts that existed before the import. They are easy to find because the accounts are five digits long (Ex: 55434). In case you need a refresher, the names are:
- Payroll Liabilities
- Members Draw
- Members Equity
- Opening Balance Equity
- Payroll Expenses
FAQ
Q: Where do I get the COA Excel document that I'm supposed to import?
A: You can email accounting@ascendrms.com to get the document(s).
KB22-062